Delegation Solutions for Power Apps People Picker & Tech Orders!
Overview:
This blog post provides step-by-step guidance on setting up delegation solutions for the Power Apps People Picker. We begin with the creation of a SharePoint list titled “Tech Equipment Orders” and move on to demonstrate linking this list with a new form in Power Apps. This ensures a smooth workflow for tech equipment requests.
Creating a SharePoint List for Tech Equipment Orders:
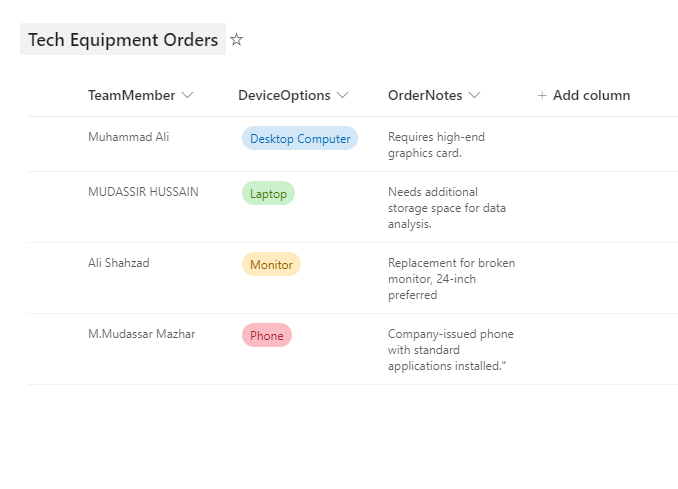
Start by establishing a new SharePoint list titled “Tech Equipment Orders”.
This list should feature columns like:
- TeamMember – categorized under ‘person’.
- DeviceOptions – a ‘choices’ type, offering selections like desktop computer, laptop, monitor, and phone.
- OrderNotes – formatted as a ‘multiple lines of text’ type.
Setting Up a Form with People Picker in Power Apps:
Next, launch Power Apps and begin with a new blank app. At the screen’s top, insert a label titled “Tech Equipment Orders”. After that, establish a data connection to your SharePoint list named “Tech Equipment Orders“. Connect this data source and place an “Edit Form” on display, linking it to the ” Tech Equipment Orders “ list on SharePoint.
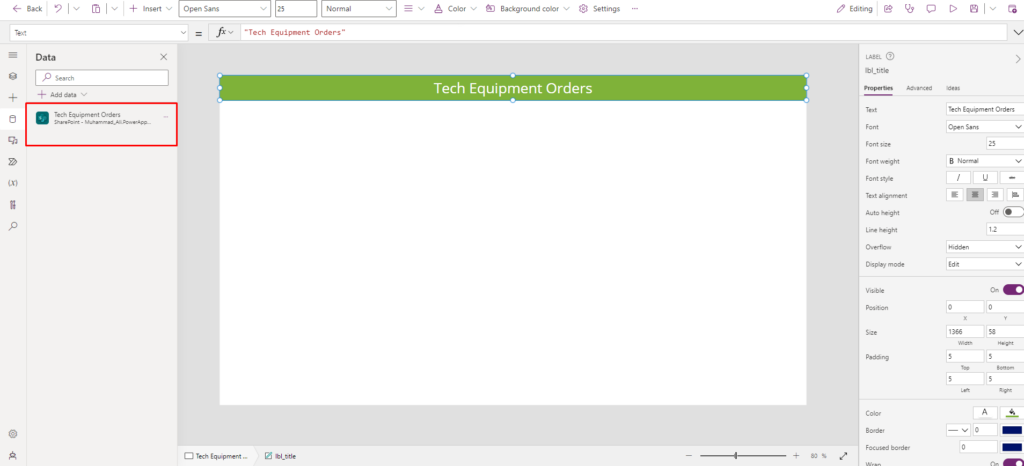
Place an “Edit Form” on the display and link it to the ” Tech Equipment Orders “ list on SharePoint.
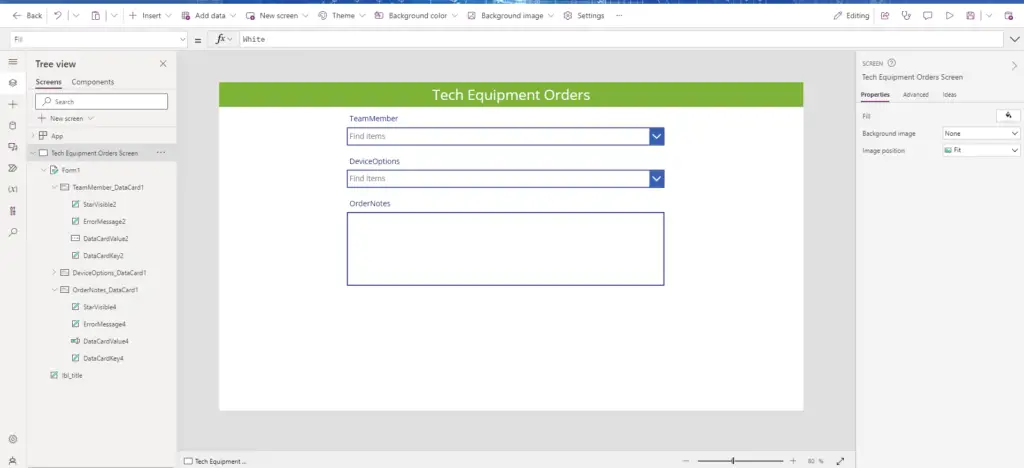
Form Adjustments for Improved User Experience:
Make sure to adjust the form’s DefaultMode to “New” so a new entry gets added upon form submission. Change the combo box’s placeholder text to “Find TeamMember” rather than using “find items”. In the InputTextPlaceholder property of the DataCardValue2, input “Find TeamMember”.
DefaultMode: FormMode.New
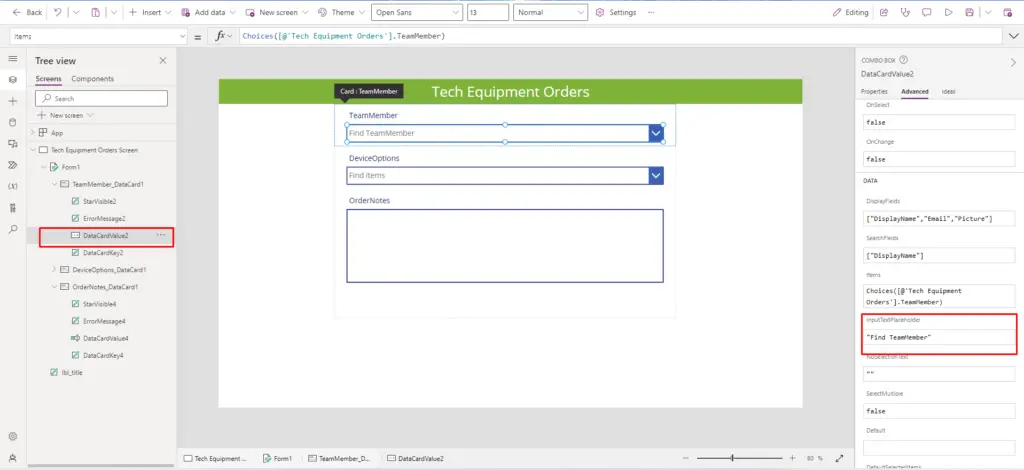
"Find TeamMember"
This will show the phrase “Find TeamMember“ when there’s no active selection in the DataCardValue2.
Delegation Challenges and Solutions:
For managers selecting an employee for new Tech Equipment, they typically use DataCardValue2. However, the default Edit Form employs the Choices function, which has its limitations. Fortunately, we can overcome this by utilizing the Office 365 Users connector, ensuring accessibility for every member.
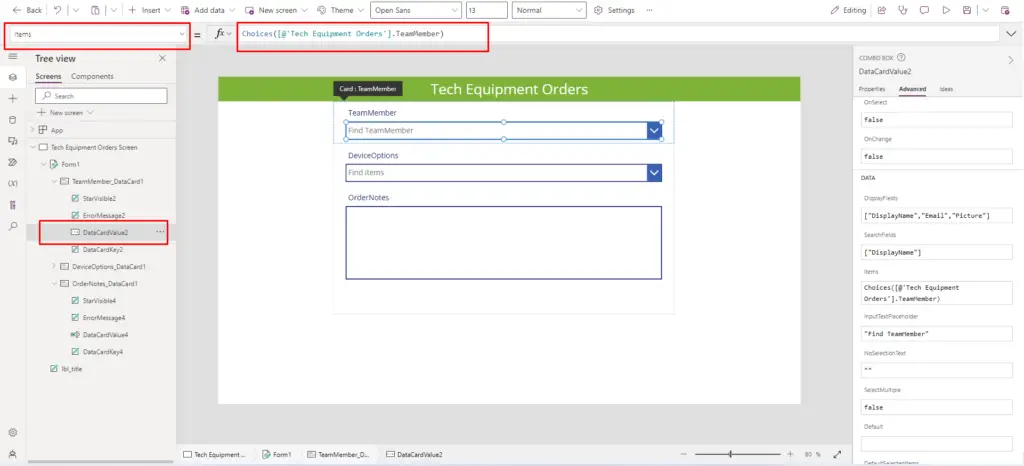
Integrating with Office 365 User Search:
Integrate your app with the Office 365 Users data connector. This step enables comprehensive user search functionality. Utilize the “search for users” function from the Office 365 Users connector to populate the combo box with DataCardValue2 names.
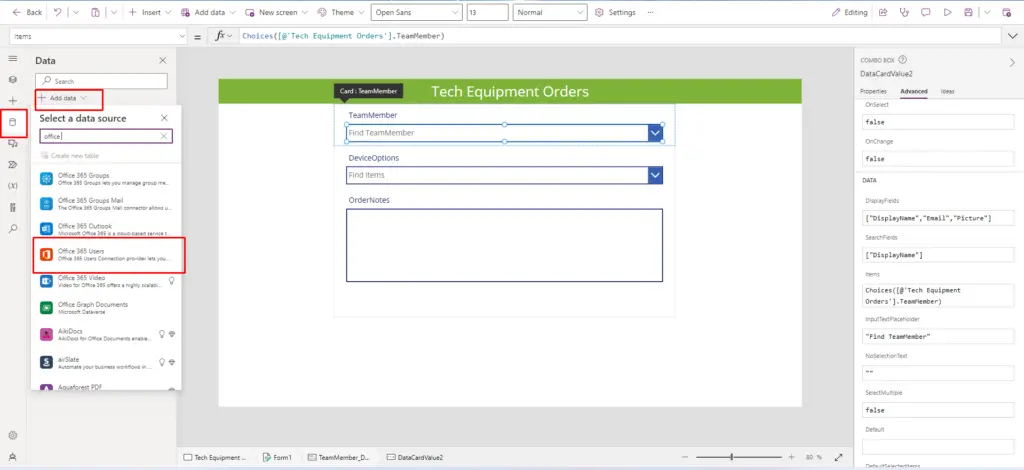
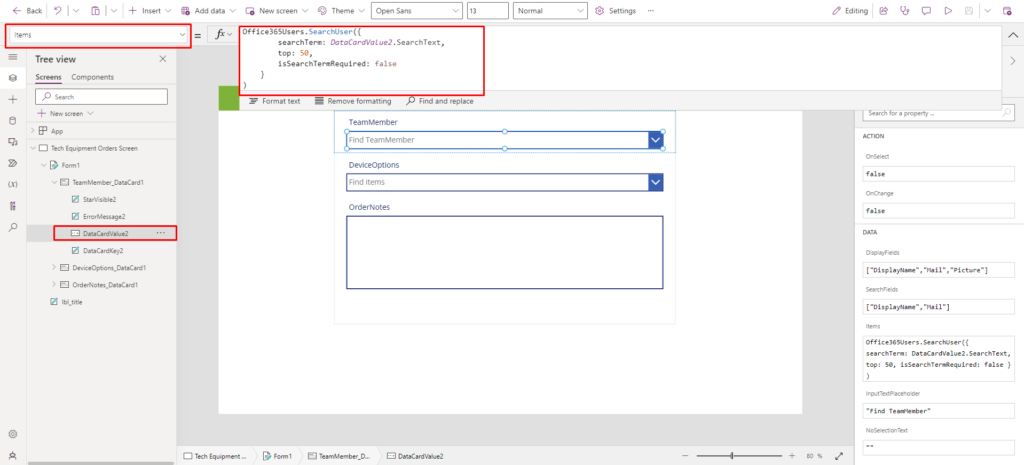
Input the following code into the Items property of DataCardValue2.
					Office365Users.SearchUser({
        searchTerm: DataCardValue2.SearchText,
        top: 50,
        isSearchTermRequired: false
    }
)
Configuring Search and Display Fields:
We want to show both the user’s complete name and email within DataCardValue2 results. Therefore, update the DisplayFields and SearchFields properties of your DataCardValue2 accordingly.
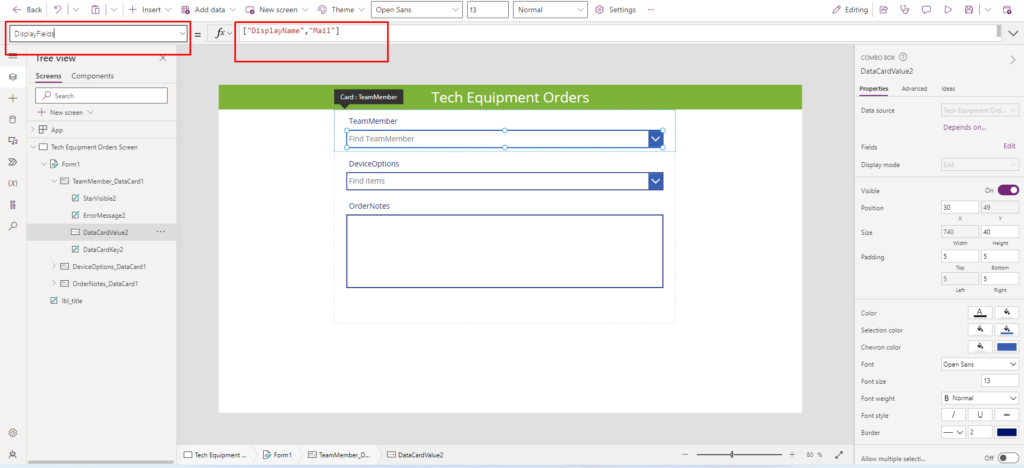
Customizing the Combo Box
Customization is key. For example, you can update the DisplayFields property with the code
["DisplayName","Mail"]
This allows for displaying both the user’s complete name and email within search outcomes.
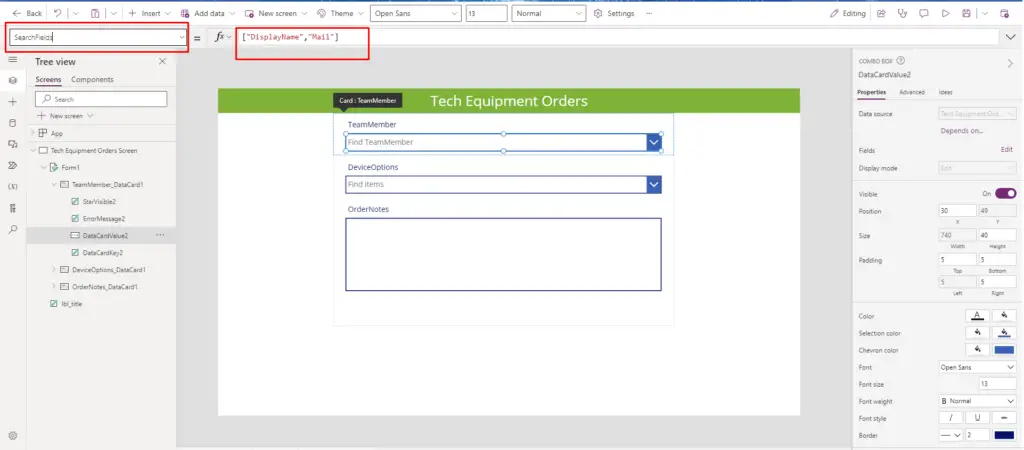
You can use the following code in the SearchFields property of the DataCardValue2 to enable searching based on the user’s full name or email:
["DisplayName","Mail"]
Validating People Picker Functionality:
To ensure that the People Picker DataCardValue2 works as intended, follow these steps.
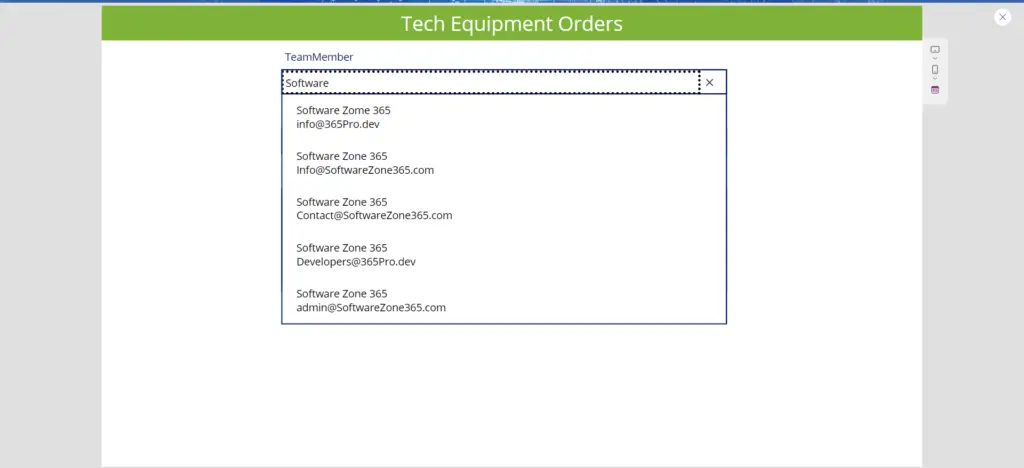
First, click the Combo box button within DataCardValue2.
Then, if the TeamMember you’re looking for isn’t visible, use the search feature.
Remember, adjust the Update property of the People Picker Card to ensure correct data entry.
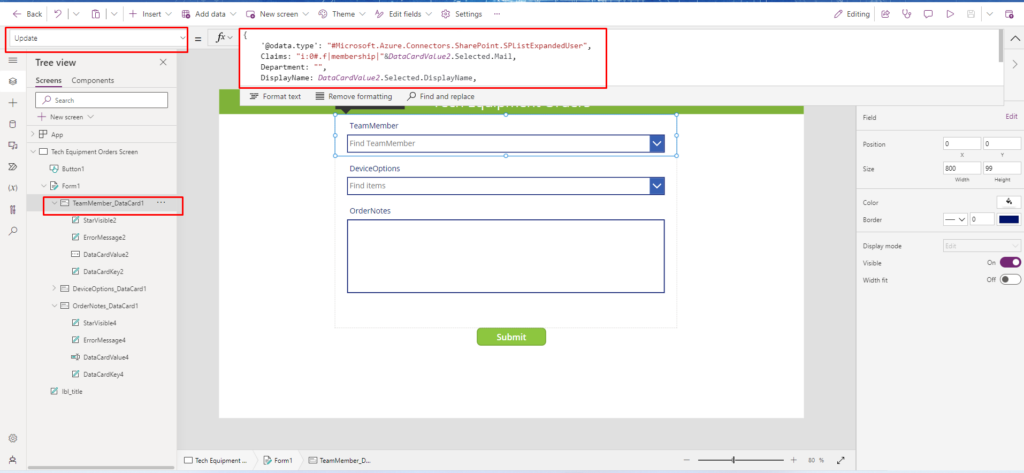
Apply this code to the Update property of the employee card control. It’s equivalent to the code used for Patching a person field.
					{
    '@odata.type': "#Microsoft.Azure.Connectors.SharePoint.SPListExpandedUser",
    Claims: "i:0#.f|membership|" & DataCardValue2.Selected.Mail,
    Department: "",
    DisplayName: DataCardValue2.Selected.DisplayName,
    Email: DataCardValue2.Selected.Mail,
    JobTitle: "",
    Picture: ""
}
Form Submission and Notification:
Finally, provide a mechanism for managers to submit the form.
Insert a new button at the form’s bottom and use the appropriate code to submit and notify success.
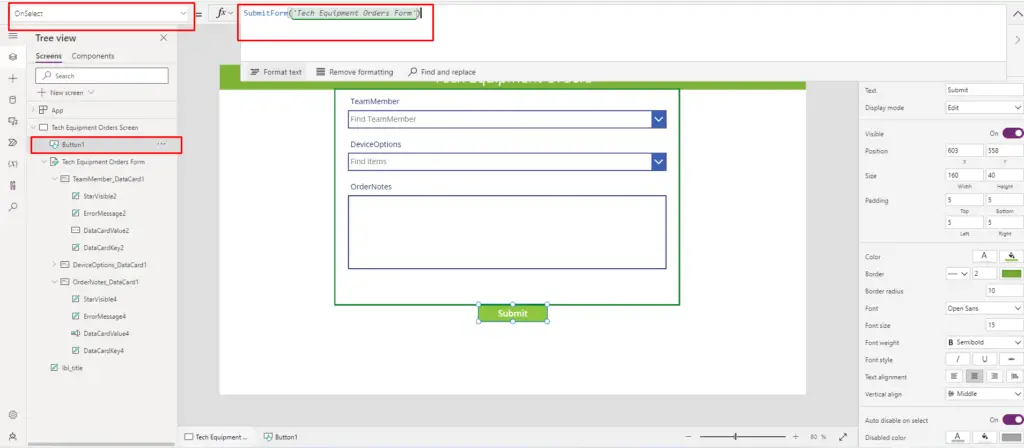
Next, utilize the following code in the OnSelect property to submit the form.
SubmitForm('Tech Equipment Orders Form')
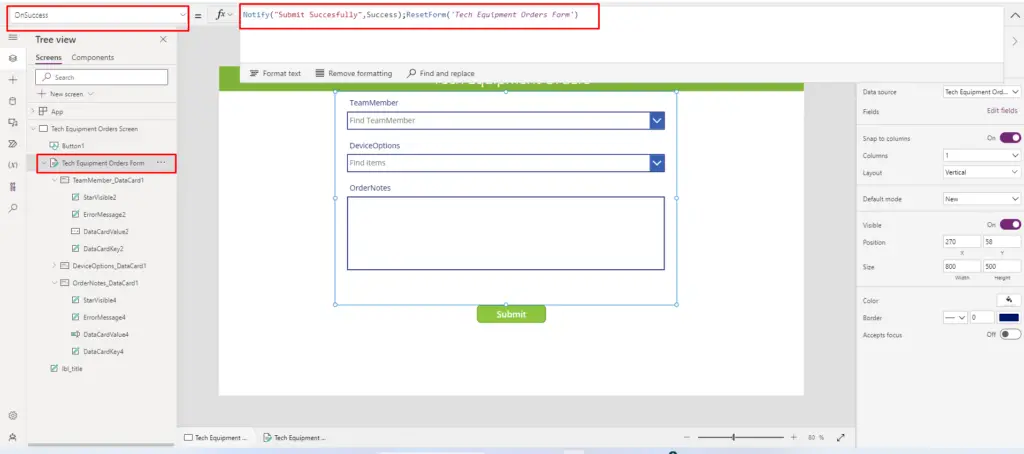
Write this code in the OnSuccess property of the form; at this stage, our work is complete.
Notify("Submit Succesfully",NotificationType.Success);ResetForm('Tech Equipment Orders Form')
Additional Reads:
Various aspects like Power Apps People Picker, SharePoint integration, choice columns, and “Edit Form” customizations can revolutionize tech equipment procurement processes in organizations.
Reference: Understand delegation in a canvas app
Conclusion:
By harnessing the power of Power Apps and SharePoint, organizations can now make their tech equipment ordering process more efficient. The People Picker feature makes identifying team members easy, while the customized list simplifies equipment choice.
