Power Apps Button With Icon And Text !
Overview: Designing Stylish Buttons with Icon in Power Apps
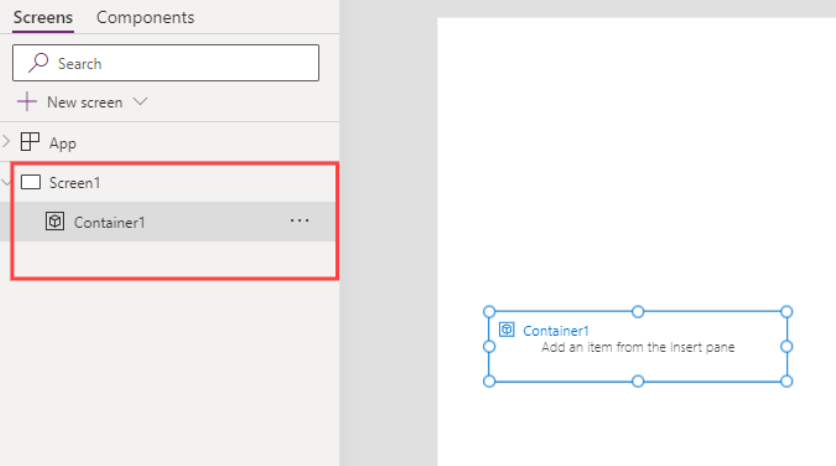
In this guide, we focus on creating Stylish Buttons with Icon in Power Apps, a design that stands out in modern applications. By using the Treeview feature to add a container, the author illustrates the precise steps to adjust the button’s dimensions, color, positioning, and adding an icon to achieve a refined look.
Step 1: Setting Up a Container in Power Apps
First, you need to add a Container from the Treeview. Set the container as below:
					Width=200
Height= 70
Radius=20
Step 2: Adding and Customizing the Submit Button
Now add a Button and rename it to Submit_Btn inside the container.

Changing the button's attributes for style:
					Width= Parent.Width
Height= Parent.Height
X=0
Y=0
Color= RGBA(255, 255, 255, 1)
Fill= RGBA(141, 198, 63, 1)
Align= Align.Right

Step 3: Integrating the Save Icon in Power Apps Button
Now add the Save icon in the Container and adjust its properties as follows:
					Width=64
Height= Parent.Height
X=30
Y=0

Button is now ready!
Conclusion: The Impact of Stylish Buttons with Icons in Power Apps
Creating a stylish button with an icon in Power Apps is straightforward. By setting the container properties, adjusting the button details, and placing the save icon appropriately, one can achieve an attractive and functional button design suitable for any Power Apps project. This method of designing stylish buttons with icons truly enhances the user interface, making your applications more user-friendly.
Advanced Tips for Elevating Power Apps Button Designs!
- Dynamic Button Behavior in Power Apps: Incorporate formula-driven behaviors into your buttons.
- Hover Effects for Stylish Buttons: Provide visual feedback by altering the Fill or Color property.
- Tooltip Integration: Make designs intuitive and offer guidance on button functions.
- Icon Variations for Better UI: Use context-relevant icons.
- Animations in Power Apps: Simulate animations for better user interaction.
- Feedback Mechanisms: Offer immediate response post button click.
- Grouping and Spacing for Clarity: Ensure logical button arrangement.
- Adaptive Design for All Devices: Use Power Apps’ responsive design features.
- A/B Testing for Efficient Design: Compare two designs for better user engagement.
- Stay Updated with Power Apps Features: Keep abreast of the latest design trends and Power Apps updates.
Incorporate these advanced tips to elevate your Power Apps button design, ensuring not just style, but also functionality and user satisfaction. Combining aesthetics with usability always results in a successful app design.


