Optimizing Delivery Routes with Power Apps Map Explorer!
Overview:
Dive deep into the functionalities and advantages of the Power Apps Route Explorer.
This blog provides a step-by-step guide on creating and optimizing the Route Explorer App using Power Apps Map Explorer. From interface design to precise route calculations, the article covers the implementation of address input controls, routing properties, and features to display travel time and distance in a user-friendly format.
Introduction to the Route Explorer App:
Harness the power of the Power Apps Route Explorer!
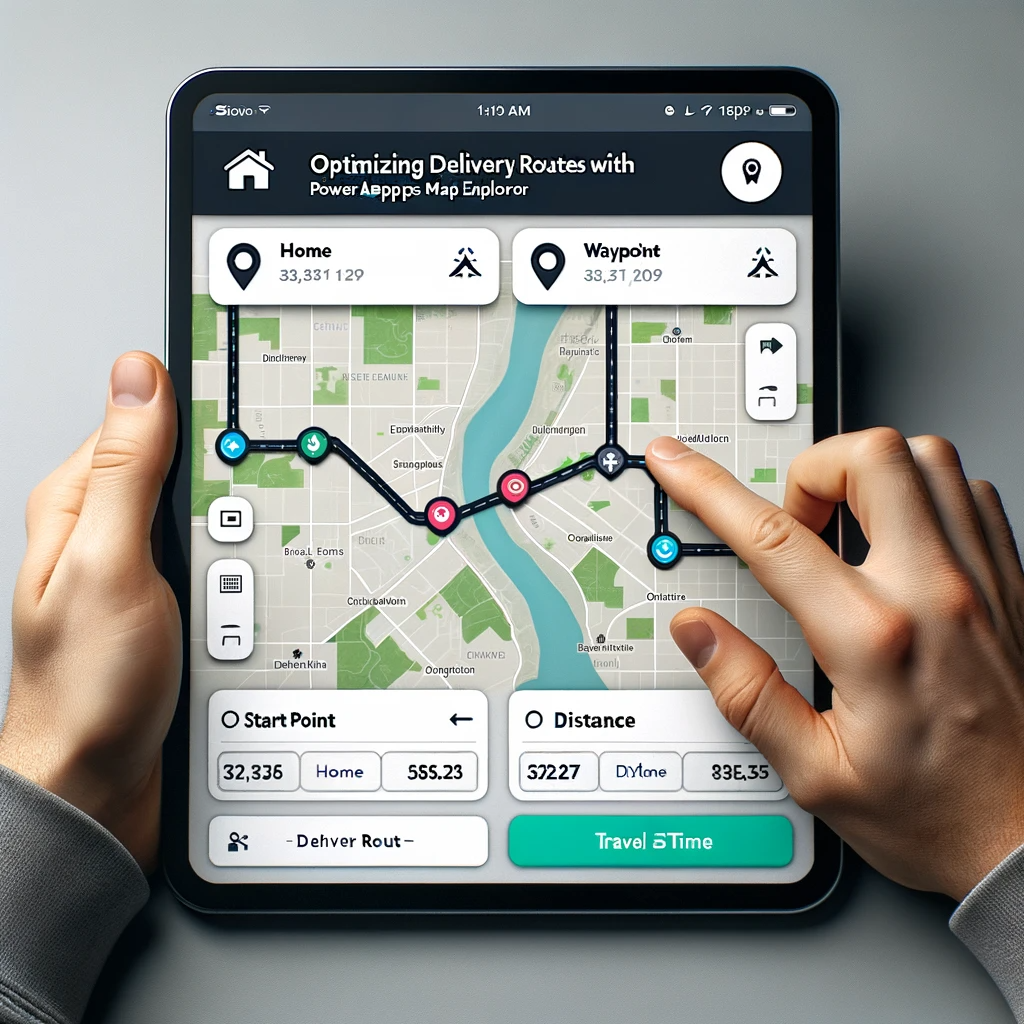
The Route Finder App serves as a tool for delivery drivers employed by a courier company. Its primary function is to assist drivers in obtaining directions between a starting point and a destination. The app displays the shortest route on a map, helping drivers navigate their journeys efficiently.
To create a map control in Power Apps Studio, follow these steps:
Begin by creating a new tablet app from a blank template.
Insert a Rectangle on the left side of the screen. Set the Rectangle fill color to Gray, which will serve as the menu.
Create another label and position it at the top of the menu. Add the text ” Route Explorer ” to this label.
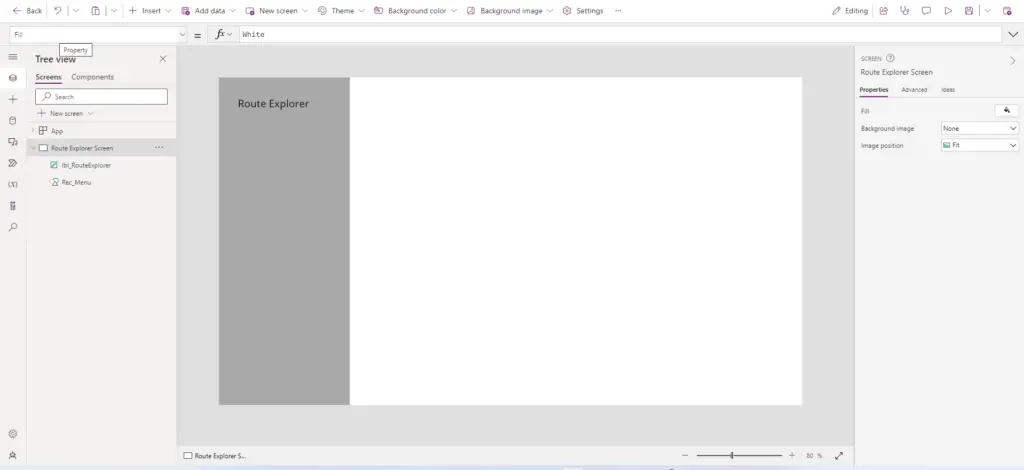
After selecting the Map control from the media dropdown, proceed to insert it onto your canvas or screen.
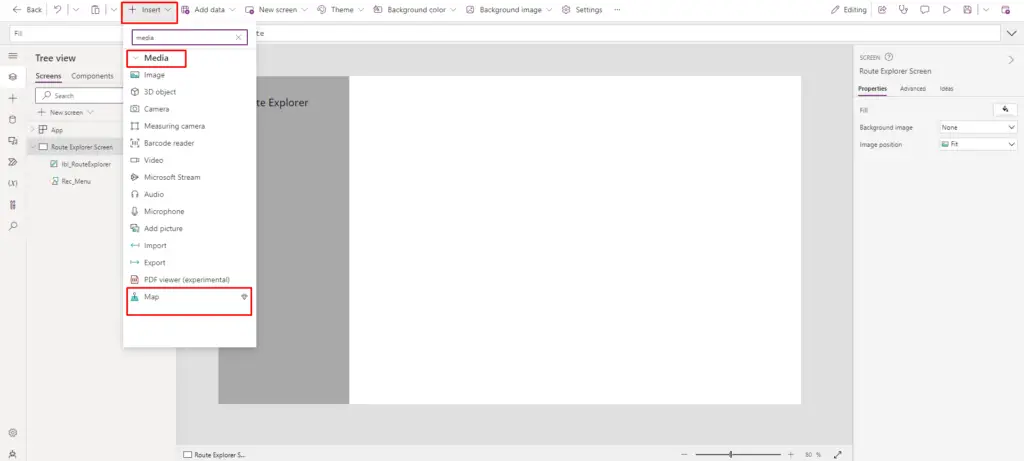
Adjust the map to occupy the entire remaining space.
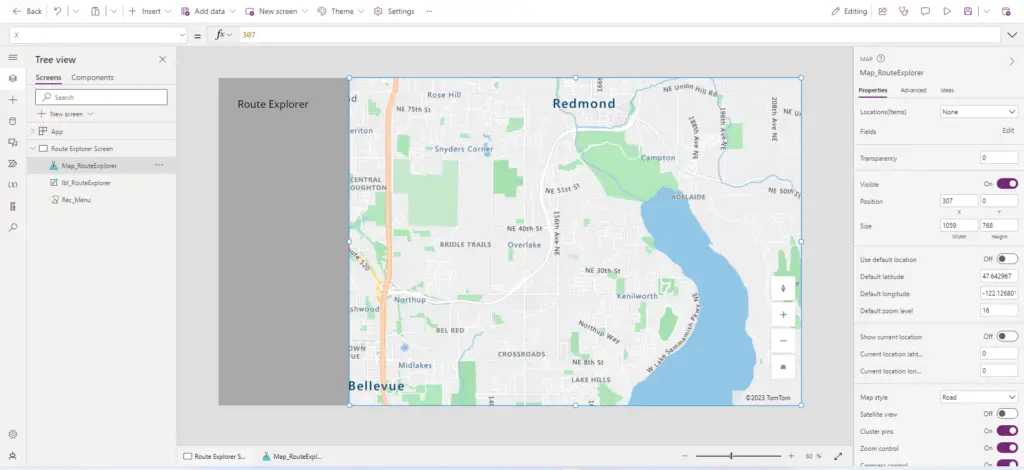
Utilizing Address Input Controls for Precise Route Calculations
To capture the starting point and Endpoint, a delivery driver can use Address Input controls. These controls facilitate the input of addresses, and by doing so, provide the latitude and longitude coordinates necessary for calculating the route. This straightforward approach ensures accurate route calculations on the map

Position an address input control within the menu to capture the starting point and add a home icon adjacent to it.
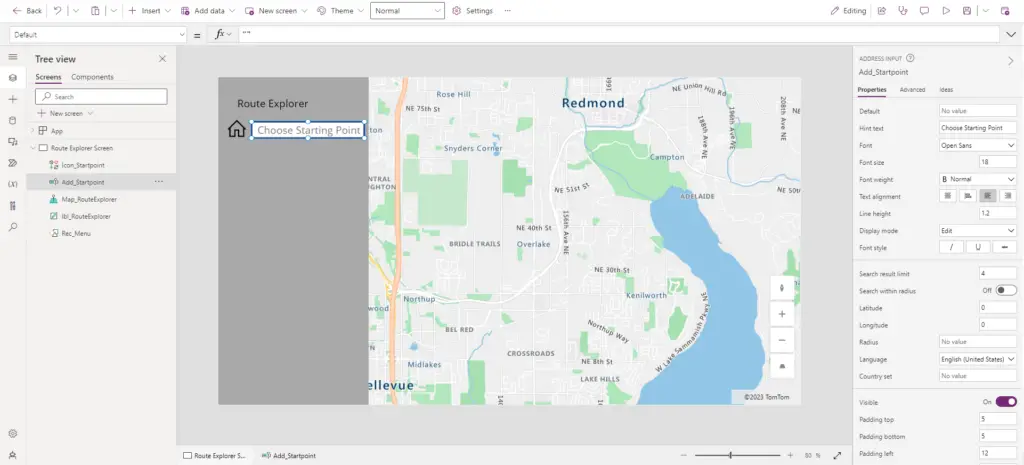
Write the provided code in the Hint Text property of the address input
“Choose Starting Point”
Additionally, we require an additional address input to collect the endpoint information. Place a new address input below the previous one and include a waypoint icon next to it.
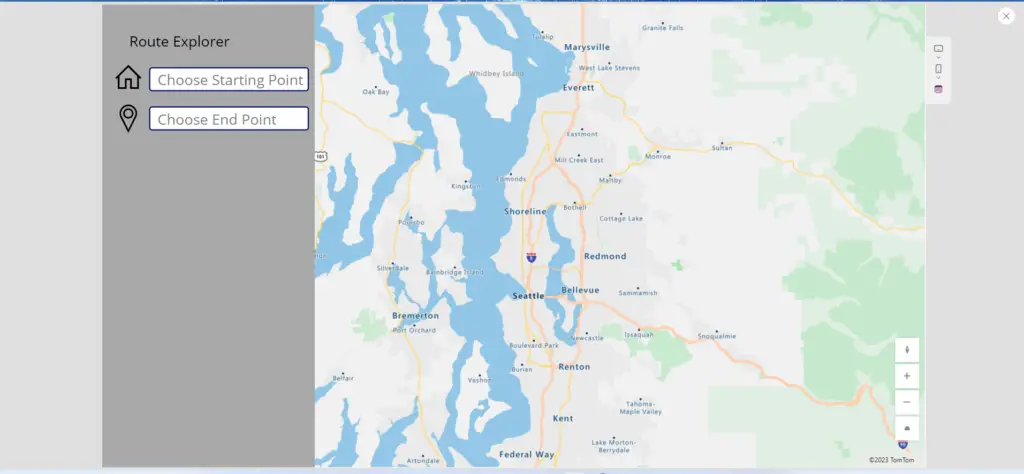
Enter this code in the HintText property of the second address input to explain its function:
"Choose End Point"
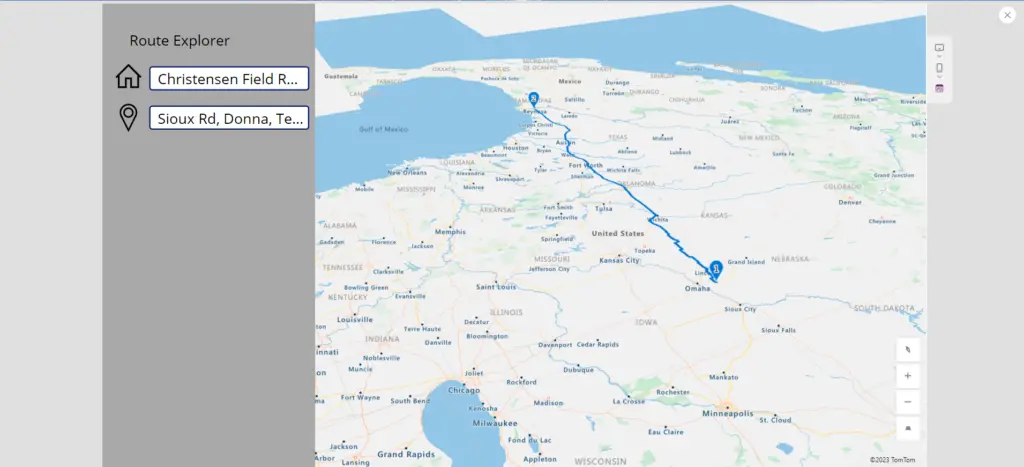
To visualize the optimal route between the starting point and the End point, draw a line on the map connecting these two points.
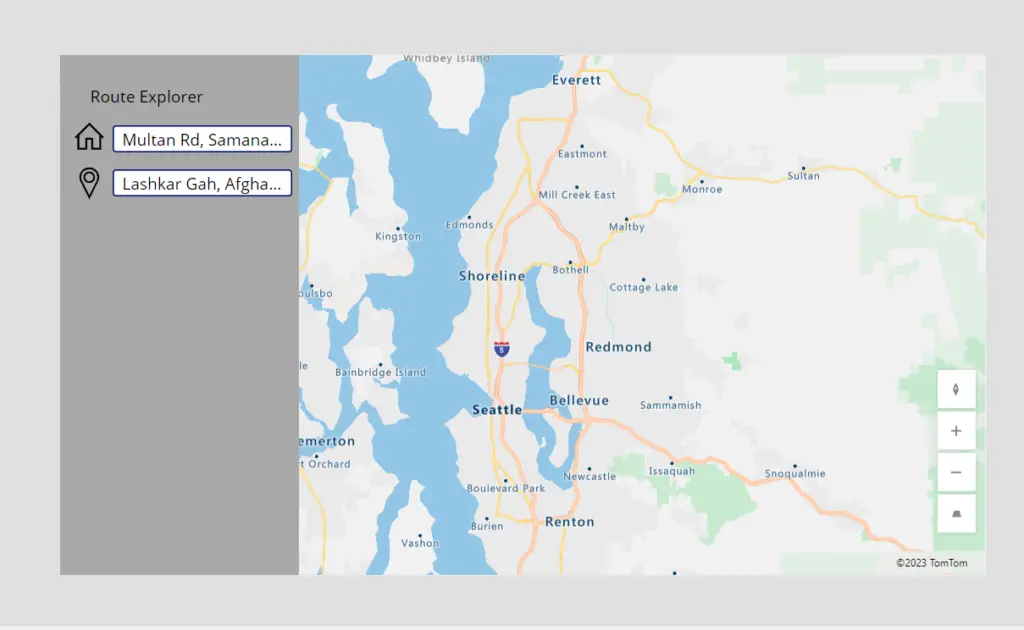
Enable Routing property
Choose the map control and set the “Enable Routing” property to “true.” This configuration instructs the map to attempt route line drawing.

Defining Waypoints: Integrating Code for Start and End Points
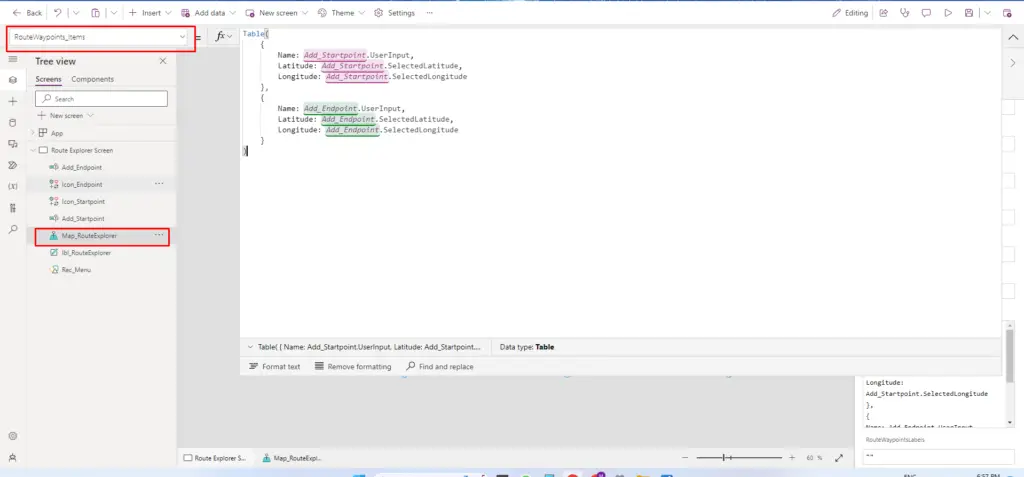
Employ the provided code in the “RouteWaypoints_Items” property of the map to specify the starting point and End point. Each waypoint should include a name, latitude, and longitude.
					Table(
    {
        Name: Add_Startpoint.UserInput,
        Latitude: Add_Startpoint.SelectedLatitude,
        Longitude: Add_Startpoint.SelectedLongitude
    },
    {
        Name: Add_Endpoint.UserInput,
        Latitude: Add_Endpoint.SelectedLatitude,
        Longitude: Add_Endpoint.SelectedLongitude
    }
)
Reference: Table function in Power Apps
Here is the code to be placed in the “RouteWaypoints_Latitude” property of the map,
"Latitude"
insert the following code into the “RouteWaypoints_Longitude” property of the map:
"Longitude"
Now, Power Apps Route Explorer: Capturing Start and Endpoint
Implementing the Power Apps Route Explorer's Estimated Travel Time Feature
In the Route Finder app, delivery drivers can view an estimated travel time between two points on the map. To implement this feature, add a clock icon to the menu and position a label next to it.

Employ the provided code in the Text property of the label to display the travel time in seconds. The map automatically calculates the travel time when the route is generated.
Map_RouteExplorer.RouteDirection.TravelTimeInSeconds
To present travel time in a user-friendly manner, converting seconds to hours and minutes is advisable.
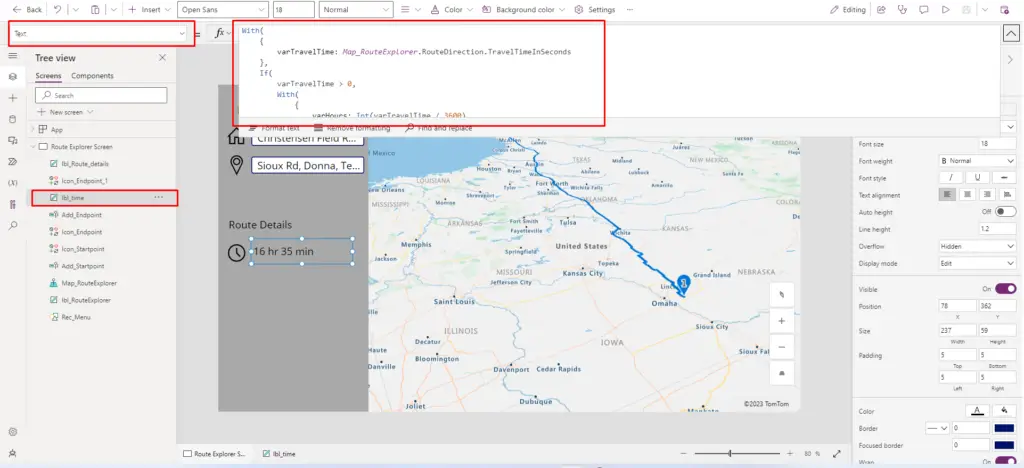
Reformat the code in the Text property of the label to display the travel time in hours and minutes.
					With(
    {
        varTravelTime: Map_RouteExplorer.RouteDirection.TravelTimeInSeconds
    },
    If(
        varTravelTime > 0,
        With(
            {
                varHours: Int(varTravelTime / 3600),
                varMinutes: Int(Mod(varTravelTime, 3600) / 60)
            },
            Text(
                varHours & " hr " &
                varMinutes & " min"
            )
        ),
        "0 hr"
    )
)
Adding Distance Display with Transport Icon in Route
Finder App.
To display the distance between the starting point and endpoint in the Route Finder app, delivery drivers would like a transport icon to be added to the menu. Then, position a label next to the transport icon to show the route’s distance.

Using meters as the unit of measure for distance when driving is not standard. Instead, we prefer to display the distance in kilometers.
Map_RouteExplorer.RouteDirection.LengthInMeters
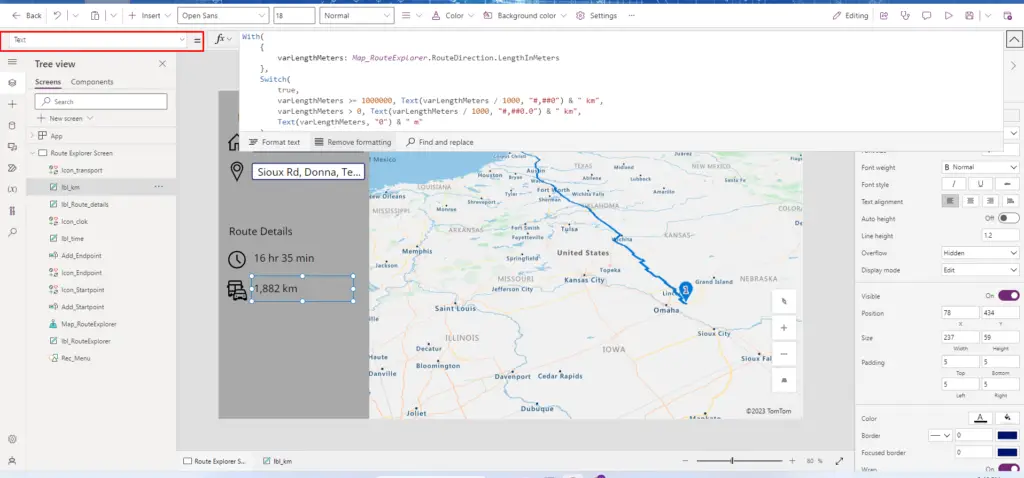
Reformat the code in the Text property of the label to convert meters to kilometers
					With(
    {
        Length_Meters_Var: Map_RouteExplorer.RouteDirection.LengthInMeters
    },
    Switch(
        true,
         Length_Meters_Var >= 1000000, Text( Length_Meters_Var / 1000, "#,##0") & " km",

         Length_Meters_Var > 0, Text( Length_Meters_Var / 1000, "#,##0.0") & " km",
        Text( Length_Meters_Var, "0") & " m"
    )
)
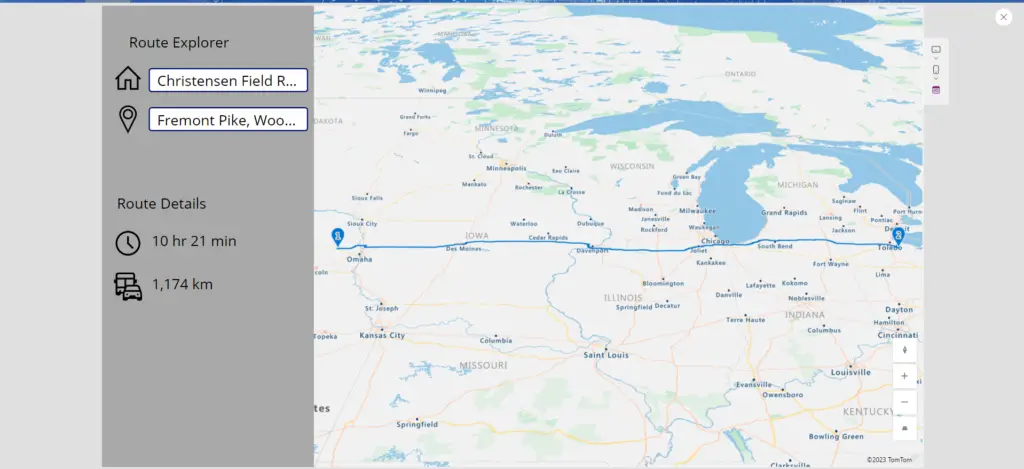
The development of the Route Explorer app is now complete!
Conclusion:
Power Apps Route Explorer app is an essential tool for delivery drivers, enhancing efficiency by providing optimal routes and crucial travel data. Through Power Apps Map Explorer, businesses can now easily implement this solution, ensuring timely deliveries and superior user experience for drivers.

