Introduction to SharePoint List Updates
Creating Your SharePoint List:
- Firstly, sign into the Sharepoint portal.
- Then, select your desired site collection to create a new list.
- Navigate to the ‘Gear’ icon in the upper-right corner and select ‘Site Contents’.
Next, click the ‘New’ button and choose ‘List’.
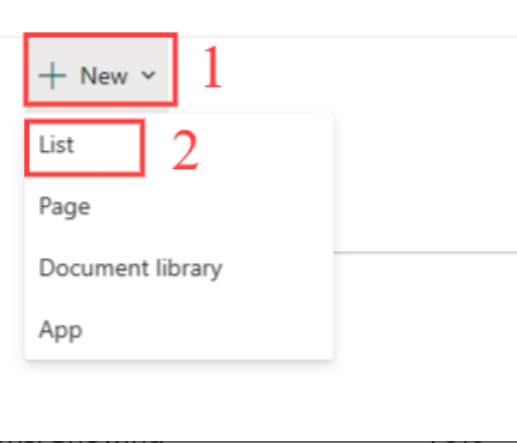
You’ll be directed to the ‘Create a SharePoint list’ page. Here, opt for the ‘Blank list’ option.

Afterward, give your list a name and an optional description, and hit ‘Create’.
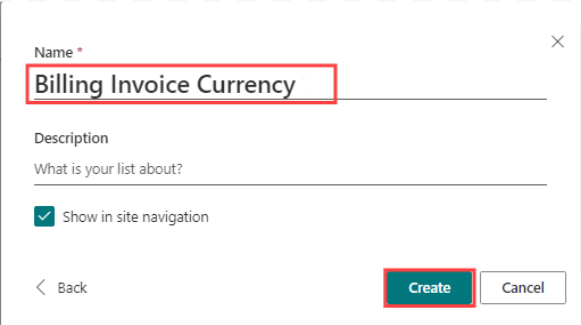
Adjusting List Settings:
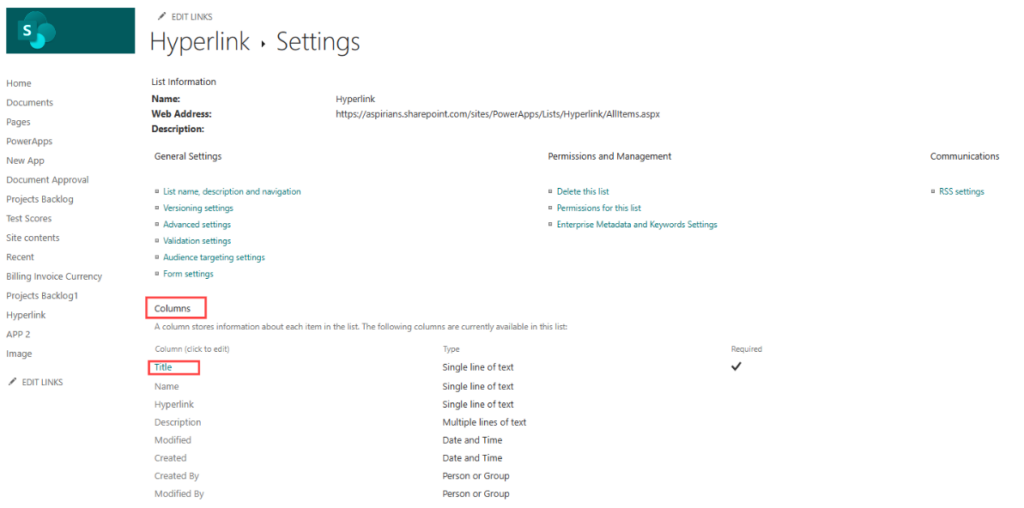
To change the “Title” column to “Not Required,” go back to the ‘Gear’ icon and click on ‘List Settings’.
In the Columns section, select ‘Title’.
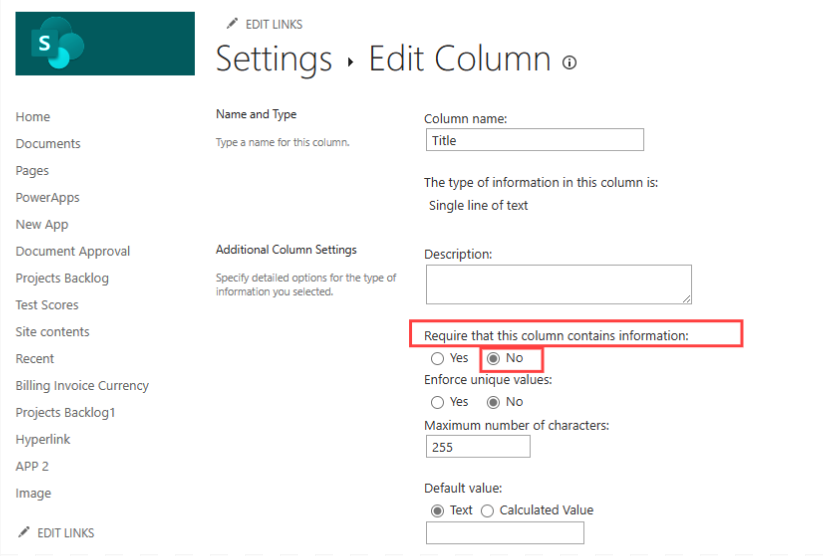
Now, choose “No” to indicate that this column should not require information and click ‘Save‘.
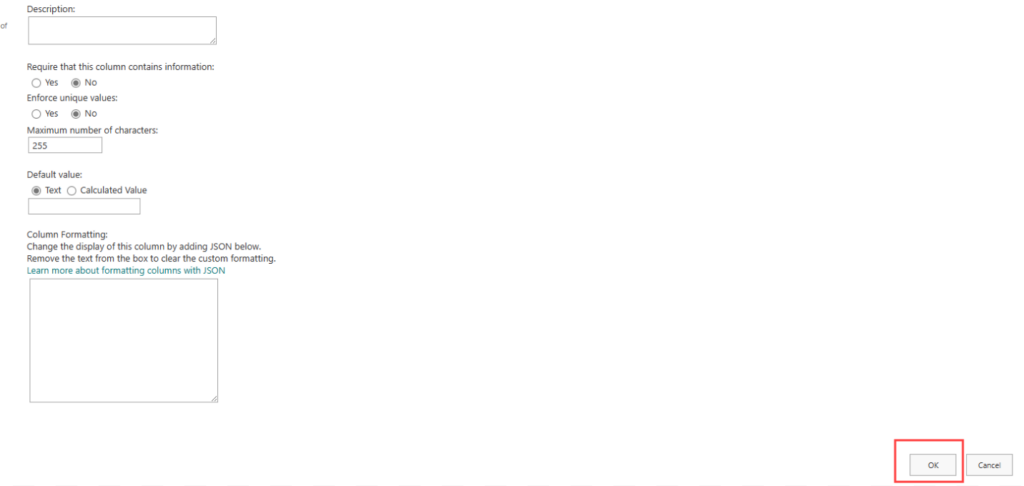
Moreover, you can add more columns by selecting the ‘+Add column’ function.
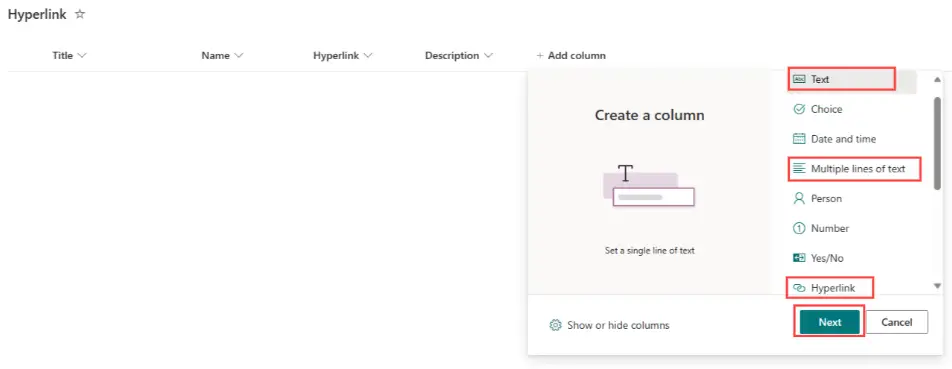
Include “Name” (single-line of text), “Hyperlink” (Hyperlink), and “Description” (single-line of text) columns.
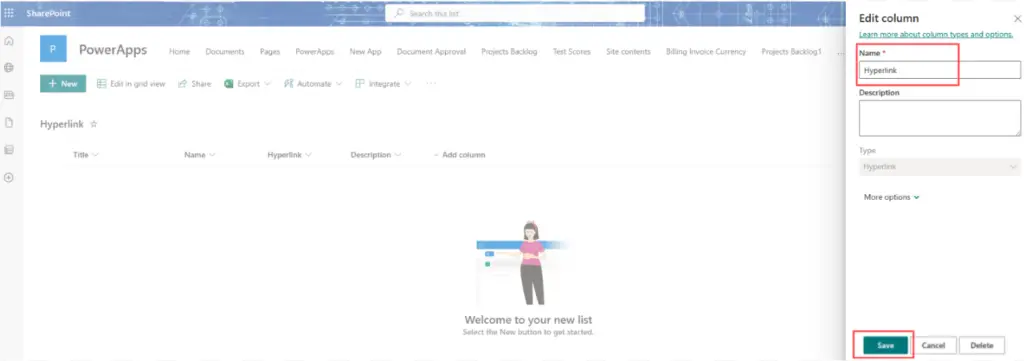
Designing the Patch Function in Power Apps:
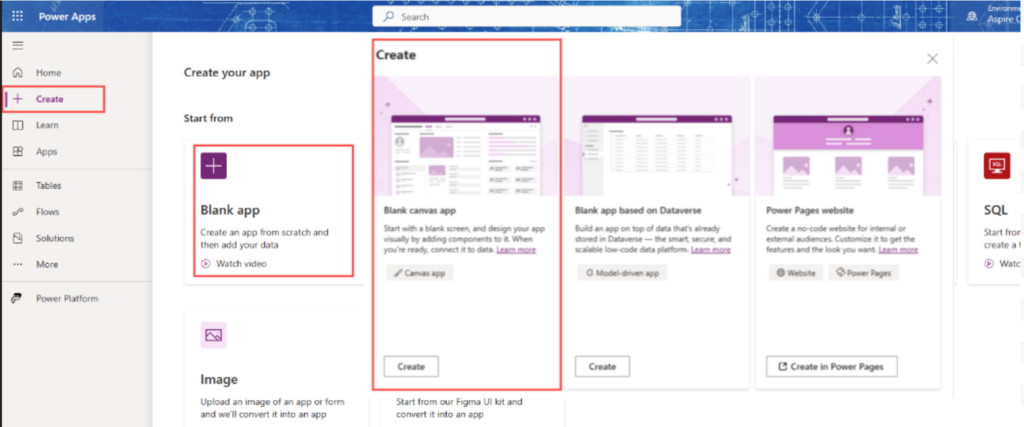
Creating a New Canvas App: :
- Initially, log into the Power Apps portal.
- Click on “Create” and select “Canvas app from blank”.
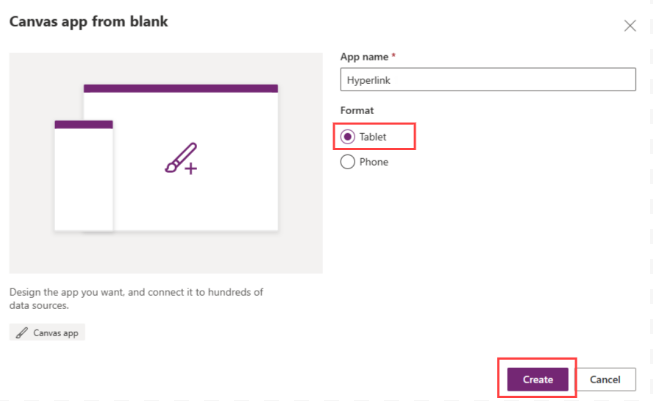
Title your app and choose the format suitable for tablet devices.
Accessing SharePoint Data:
In the app, proceed to the “Data” section on the left-hand menu. Here, select “Add data” and search for “SharePoint”.
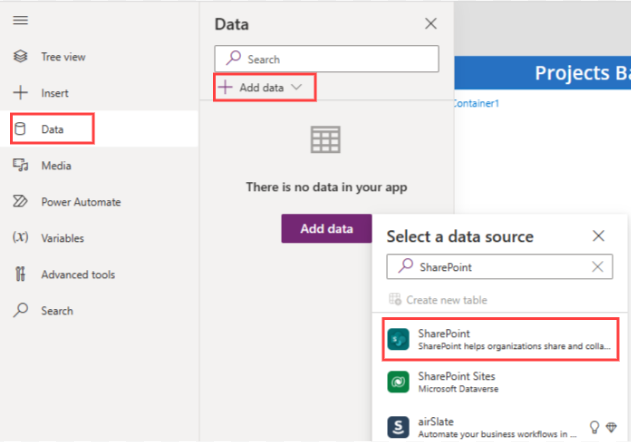
Following this, opt to ‘Add a connection’.

For the connection, use the “Recent sites” list or manually input the site’s URL. Once you have inputted the URL, click on “Connect”.
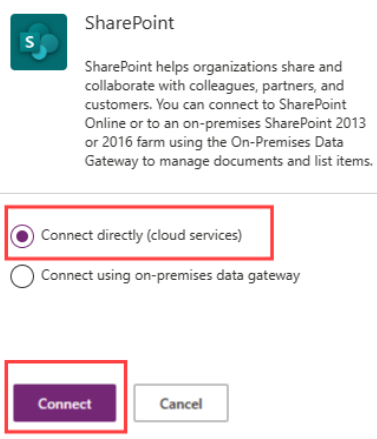
Connecting to Your List:
After establishing a connection, check the boxes next to the lists you wish to use, and then click ‘Connect’.
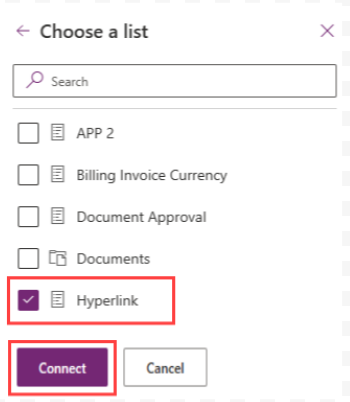
Setting Up the User Interface:
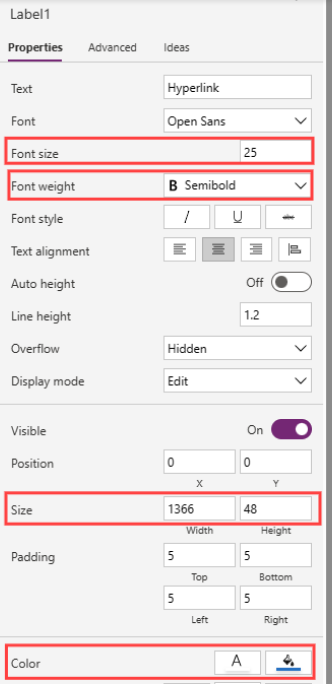
To start, create a title bar with a “Label” at the top of the screen and name it “Hyperlink”.
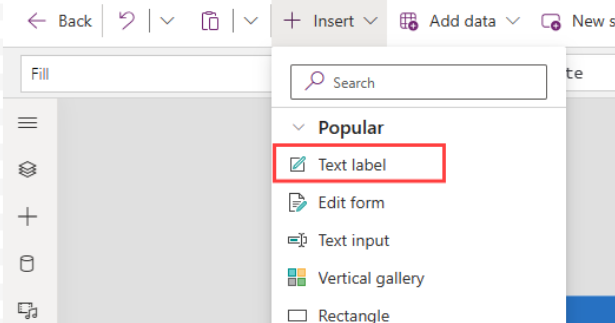

Furthermore, please integrate these configurations.
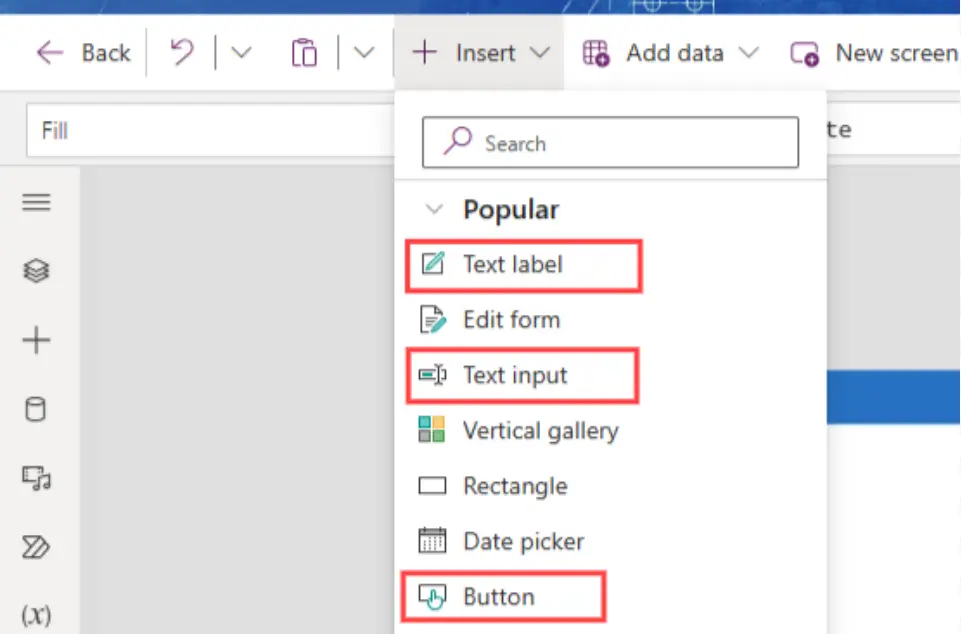
Subsequently, add “Text Labels,” “Text Input,” and a “Button” to the screen, labeling them as “Name,” “Hyperlink,” and “Description”.
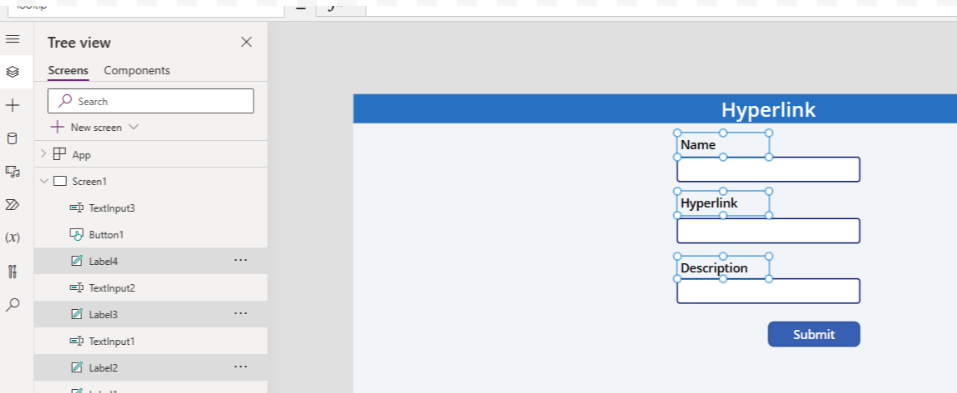
- Incorporating descriptive elements within each designated “Labels.”
- Name
- Hyperlink
- Description
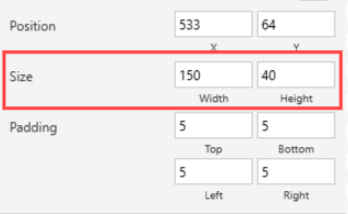
Additionally, set the ‘size‘ parameters for each ‘Label’.
Ensure the “Default” property value of the “Text input” is left empty.
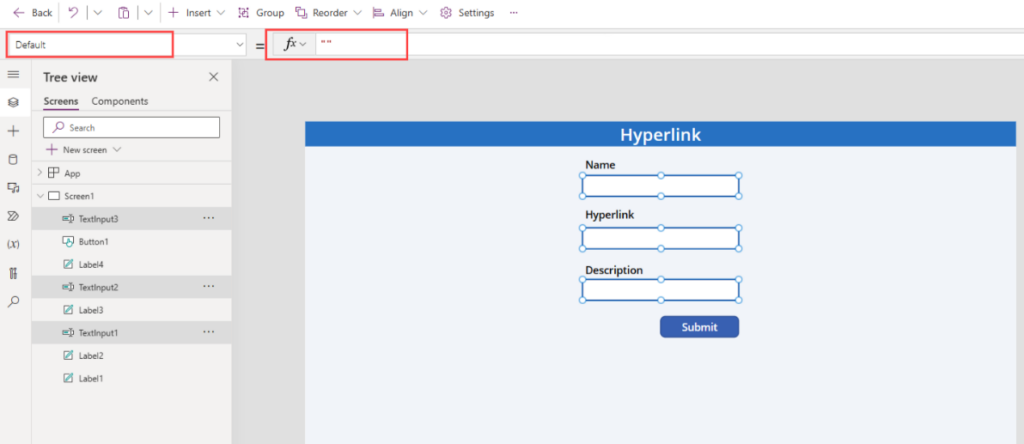
Also, adjust the ‘size’ and ‘Left Padding’ for the ‘Text Input’ elements.
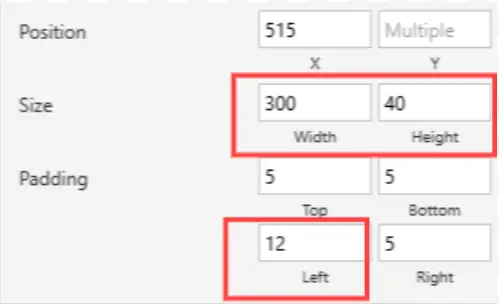
Implementing the Button's Patch Function:
Set the designated ‘size‘ parameters into the associated ‘Button‘ element.
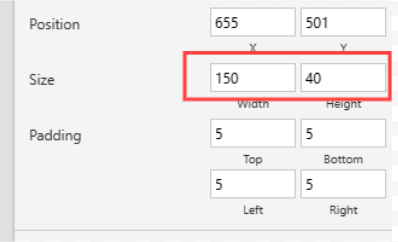
To facilitate the transfer of data utilizing the ‘PATCH’ method within the ‘Button’ interface.
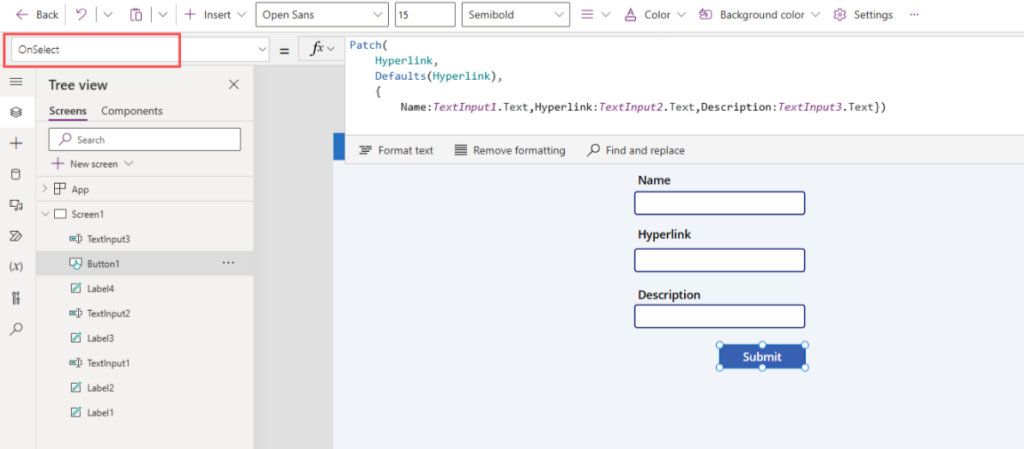
For updates, insert the following code into the ‘OnSelect’ property of the button:
					// Add a new entry to the Hyperlink list.
Patch(
    Hyperlink,
    Defaults(Hyperlink),
    {
        Name: TextInput1.Text,
        Hyperlink: TextInput2.Text,
        Description: TextInput3.Text
    }
);
After saving, reset the ‘Text input‘ fields to their default state:

Resetting the Form:
Subsequent to the submission, reset the ‘Text input‘ fields using the code:
					//Generate a novel entry within the Hyperlink database.
Patch(
    Hyperlink,
    Defaults(Hyperlink),
    {
        Name: TextInput1.Text,
        Hyperlink: TextInput2.Text,
        Description: TextInput3.Text
    }
);
//To commence a reset operation for the Text input
Reset(TextInput1);
Reset(TextInput2);
Reset(TextInput3)
Confirming Submission:
Finally, affirm the successful submission with a notification:

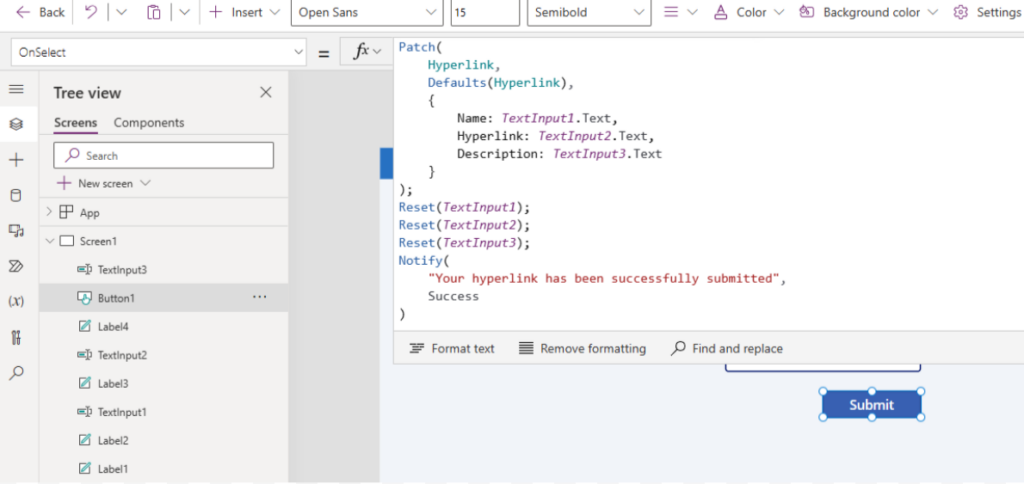
Adding the code to implement a success notification display.
					//Generate a novel entry within the Hyperlink database.
Patch(
    Hyperlink,
    Defaults(Hyperlink),
    {
        Name: TextInput1.Text,
        Hyperlink: TextInput2.Text,
        Description: TextInput3.Text
    }
);
//To commence a reset operation for the Text input
Reset(TextInput1);
Reset(TextInput2);
Reset(TextInput3);
//To Display a Success Notification
Notify(
    "Your hyperlink has been successfully submitted",
    NotificationType.Success
)
Reference: Patch function
The Conclusive Appearance of this Application
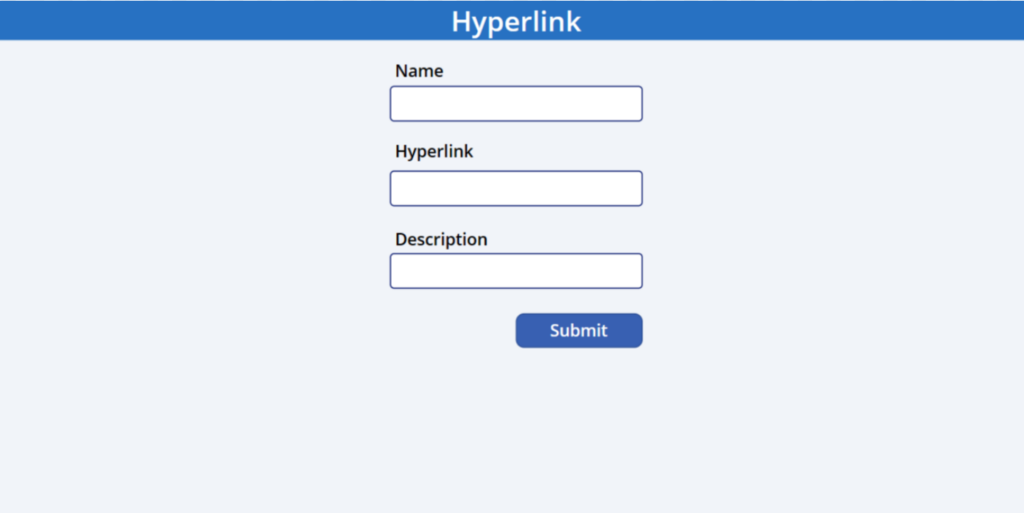
Conclusion and Testing:
In conclusion, your app should now provide a seamless process for updating SharePoint Hyperlink columns. Importantly, conduct thorough testing to ensure everything functions as intended.


