Creating Modal Dialogs in Power Apps for Quality Checks!
Overview:
Creating Modal Dialogs in Power Apps for Quality Checks is an essential skill for quality control inspectors. In this guide, we’ll explore how to effectively set up these modal dialogs using Power Apps. These tools simplify the process, enabling streamlined inspections and efficient documentation.
Steps to Create Modal Dialogs in Power Apps for Efficient Quality Checks
Setup The SharePoint List in Power Apps to Create Modal Dialogs for Quality Checks
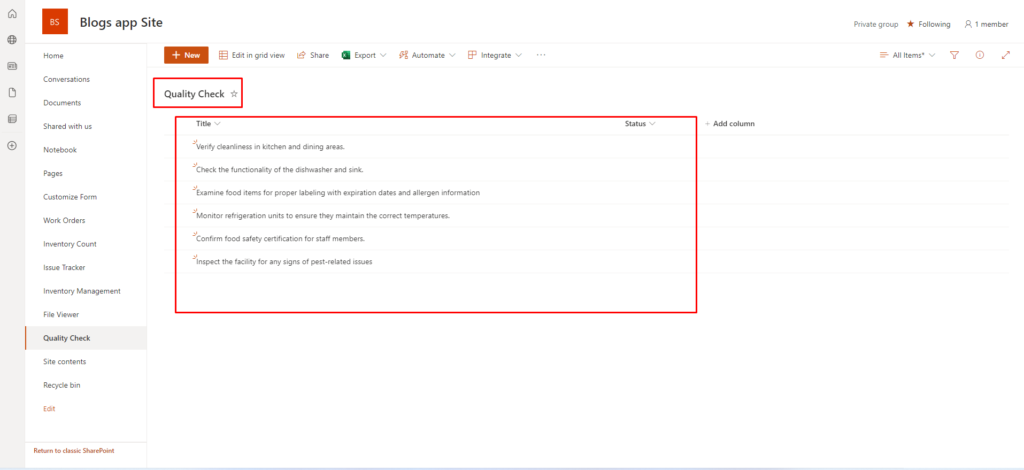
Make a new list in SharePoint called "Quality Check." In this list, include the following details:
- Title: (Single Text)
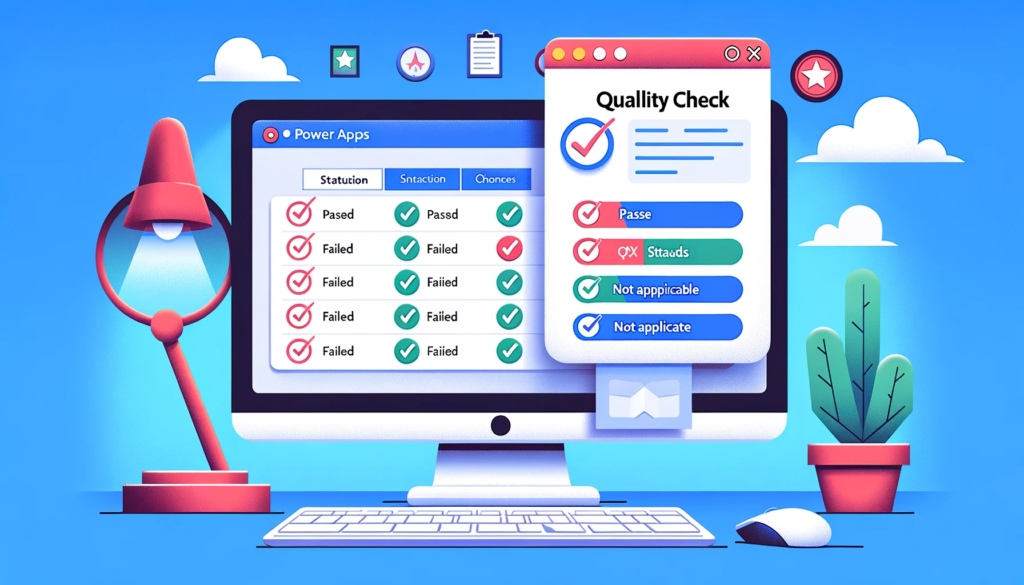
- Status: Passed, Failed, Not Applicable (N/A) (Choices:)
Fill the SharePoint list with these quality check items
Verify cleanliness in kitchen and dining areas.
Check the functionality of the dishwasher and sink.
Examine food items for proper labeling with expiration dates and allergen information.
Monitor refrigeration units to ensure they maintain the correct temperatures.
Confirm food safety certification for staff members.
Inspect the facility for any signs of pest-related issues.
Creating a Power Apps app from scratch involves multiple steps, and it can be a detailed process. I’ll provide you with a simplified outline of the steps to create a basic app. Keep in mind that you can always expand and customize your app further based on your specific needs.
Step 1: Sign into Power Apps: to Create Modal Dialogs for Quality Checks
Visit the Power Apps website https://powerapps.microsoft.com/
Step 2: Create a New App: to Create Modal Dialogs for Quality Checks
- Click on “Apps” in the left navigation menu.
- Click on the “+ New app” button.
- Select the type of app you want to create (e.g., Canvas app or Model-driven app).
Step 3: Choose a Data Source: to Create Modal Dialogs for Quality Checks
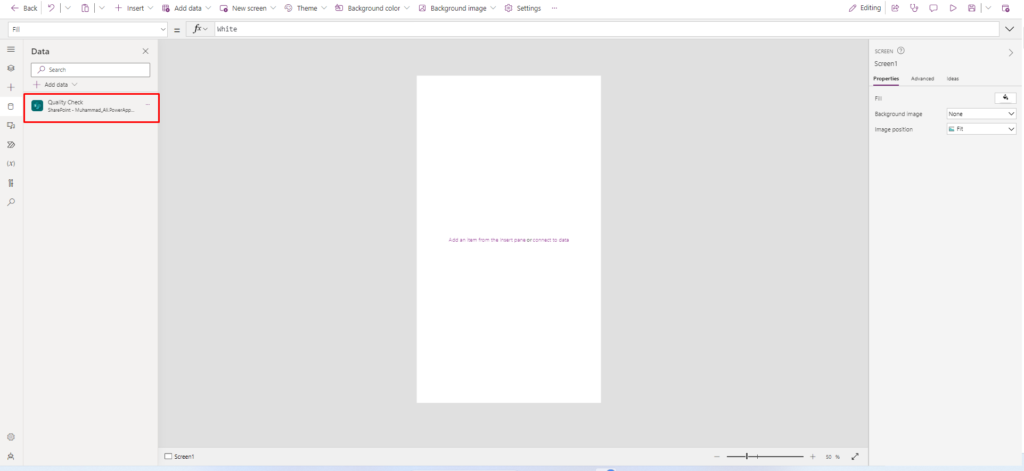
Select a data source for your app. This could be SharePoint, Microsoft Dataverse, SQL Server, Excel, etc. For simplicity, let’s choose SharePoint.
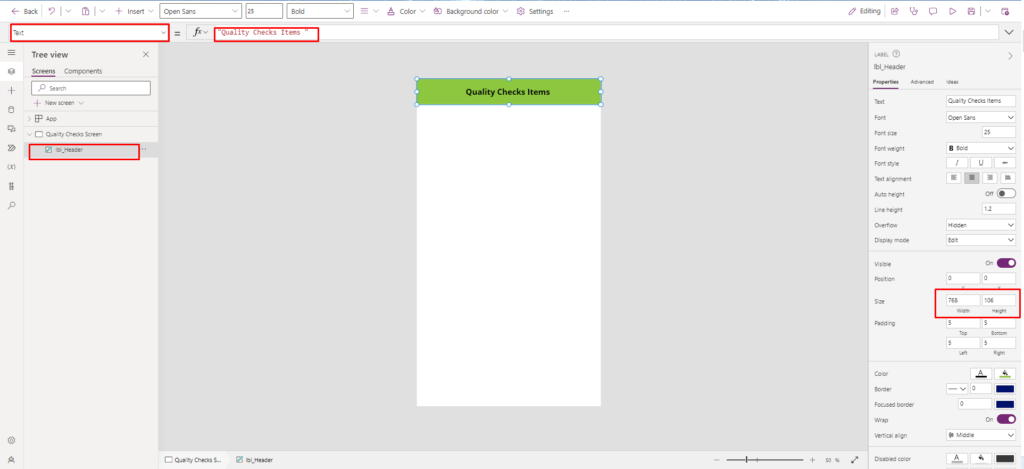
Insert the header label to show the title of the app to Create Modal Dialogs for Quality Checks
Rename the label to lbl_Header
					Text: "Quality Checks Items"
Size: 25
X:0
Y:0
Height: 106
Width: 768
FontWeight: FontWeight.Bold
Color: RGBA(0, 0, 0, 1)
Fill: RGBA(141, 198, 63, 1)
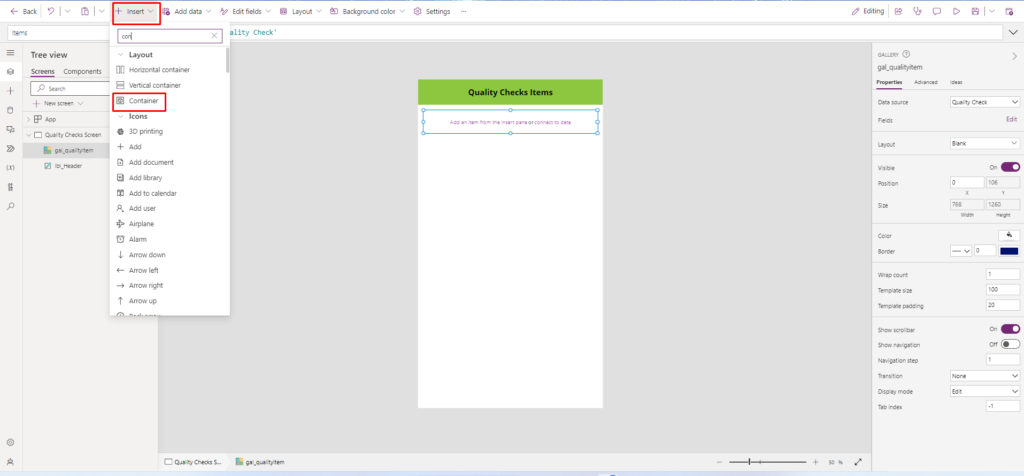
After this insert the blank vertical gallery to Create Modal Dialogs for Quality Checks
Do this step with this gallery each property
					Name: gal_qualityitem
Items: 'Quality Check' // Data source name
X:0
Y: lbl_Header.Height
Height: Parent.Height-lbl_Header.Height
Width: Parent.Width
Fill: RGBA(237, 237, 237, 1)
TemplatePadding:20
TemplateSize: 100
Insert the container inside the gallery to Create Modal Dialogs for Quality Checks
Do this the step with property of the container
					Name: Con_qualitycheckitems
X:0
Y:0
Height: Parent.TemplateHeight
Width: Parent.TemplateWidth
Fill: RGBA(255, 255, 255, 1)
BorderRadius: 5
DropShadow: DropShadow.Semilight
Insert the label inside the container to Create Modal Dialogs for Quality Checks
Do this with lbl_qualitycheckitem property
					Name: lbl_qualitycheckitem
Text: ThisItem.Title
Size: 20
FontWeight: FontWeight.Semibold
X:0
Y:0
Height: Parent.Height
Width: Parent.Width-100
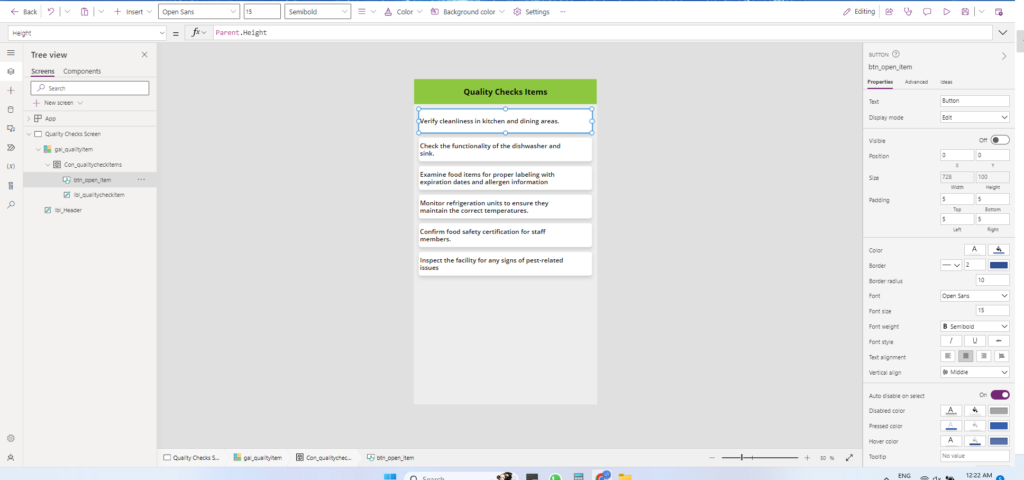
After This Insert the button controls inside this container to Create Modal Dialogs for Quality Checks
					Name: btn_open_item
Text:””
Onselect: Set(Quality_check_var,ThisItem);Set(Show_popUp,true)
X:0
Y:0
Height: Parent.Height
Width: Parent.Width
Fill: Color.Transparent
Color: Color.Transparent
AutoDisableOnSelect: false
BorderStyle: BorderStyle.None
DisabledColor: Self.Color
DisabledFill: Self.Fill
HoverColor: Self.Color
HoverFill: Self.Fill
PressedColor: Self.Color
PressedFill: Self.Fill

After this, we want to make the pop-up menu and Create Modal Dialogs for Quality Checks
Insert the Rectangle in the screen to update the property
Reference: Container control in Power Apps
					Name: Rec_Backgroud
X:0
Y:0
Height: Parent.Height
Width: Parent.Width
Fill: RGBA(166, 166, 166, 0.53)
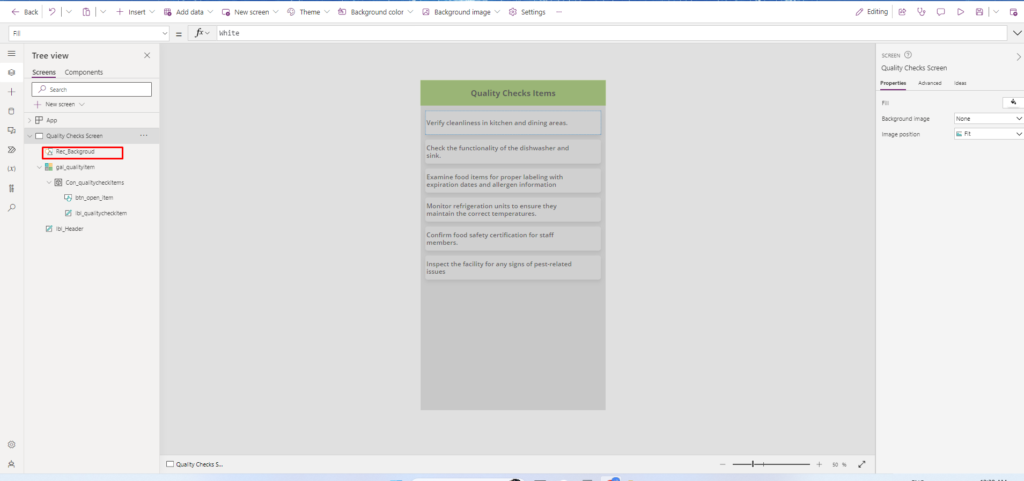
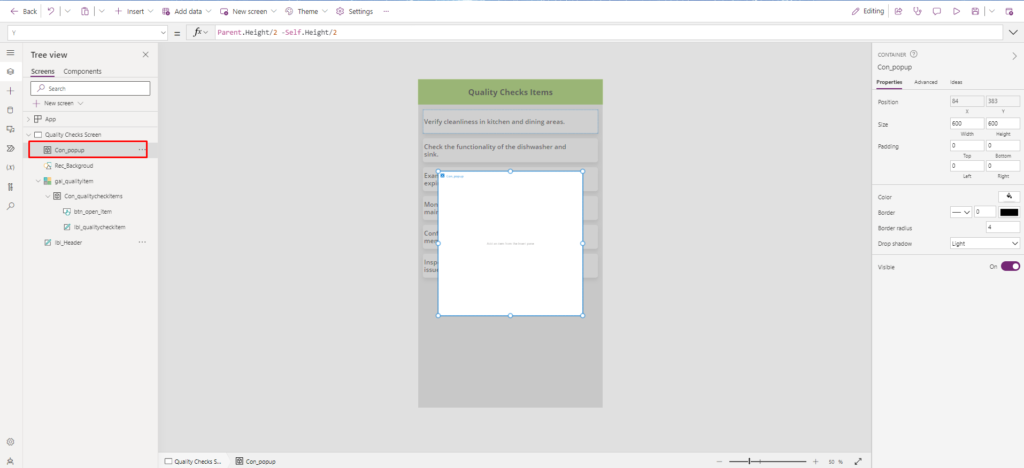
After this insert the container Do the step with this container to Create Modal Dialogs
					Name: Con_popup
X: Parent.Width/2-Self.Width/2
Y: Parent.Height/2 -Self.Height/2
Height: 600
Width: 600
Fill: RGBA(255, 255, 255, 1)
Insert the label to show the title Change the properties of the label to Create Modal Dialogs
					Name: lbl_show_title
Text: Quality_check_var.Title
Size:25
X: 0
Y: 0
Height: 100
Width: Parent.Width
Fill: RGBA(255, 255, 255, 1)
Insert the radio button to show the status choices
Name: Rad_Statuts
Item: Choices('Quality Check'.Status)
X: 0
Y: 162
Height: 254
Width: Parent.Width
Insert the button submit the response to Create Modal Dialogs
					Name: btn_Submit
Text:” Submit”
Onselect: Patch('Quality Check',Quality_check_var,{Status:Rad_Statuts.Selected});Reset(Rad_Statuts);Set(Show_popUp,false)
X: 411
Y: 537
Height: 58
Width: 174
Fill: RGBA(141, 198, 63, 1)
Color: RGBA(0, 0, 0, 1)
AutoDisableOnSelect: false
BorderStyle: BorderStyle.None
DisabledColor: Self.Color
DisabledFill: Self.Fill
HoverColor: Self.Color
HoverFill: Self.Fill
PressedColor: Self.Color
PressedFill: Self.Fill
Now, Insert the cancel icon in this container to Create Modal Dialogs
If the user wants to close the popup the click the Cancel icon Do the step with icon
					Name: Icon_cancel
X: 536
Y: 0
Height: 64
Width: 64
Color: RGBA(255, 0, 0, 1)
OnSelect: Set(Show_popUp,false)
After this make the group select the container and rectangle and Press Ctrl + G to make
the group for the Creation of Modal Dialogs
					Name: Pop_up Menu
Visible: Show_popUp

Use this code in the icon property to show a specific icon that matches whether the inspection item Passed, Failed, is Not Applicable (N/A), or has no response.
					Switch(
    ThisItem.Status.Value,
    "Passed",
    Icon.CheckBadge,
    "Failed",
    Icon.CancelBadge,
    "Not Applicable (N/A)",
    Icon.Blocked,
    Icon.Help
)
For the “Color” property, write the code to assign a unique color to each result. In other words, use this code to make sure that when an Quality Checks item Passed, it’s shown in one color, when it Failed, it’s shown in another color, when it’s Not Applicable (N/A), it’s shown in yet another color, and when there’s no response, it’s displayed in a different color.
					Switch(
    ThisItem.Status.Value,
    "Passed",
    RGBA(54, 176, 75, 1),
    "Failed",
    RGBA(184, 0, 0, 1),
    "Not Applicable (N/A)",
    RGBA(0, 134, 208, 1),
    RGBA(116, 116, 116, 1)
)
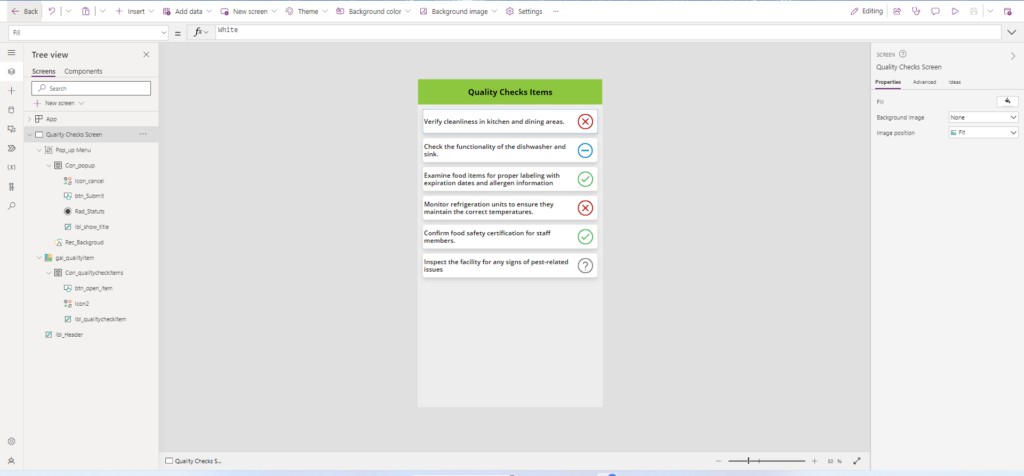
Now for this step our app is ready test this!
“When building your quality inspection tool, understanding how to effectively create modal dialogs in Power Apps for quality checks ensures that your data collection is both efficient and user-friendly.”
Conclusion:
Through the use of Power Apps, we can create an efficient and user-friendly modal dialog for quality inspections. This streamlined process ensures that quality control inspectors can perform their duties with ease and efficiency, integrating with SharePoint for robust data management.

