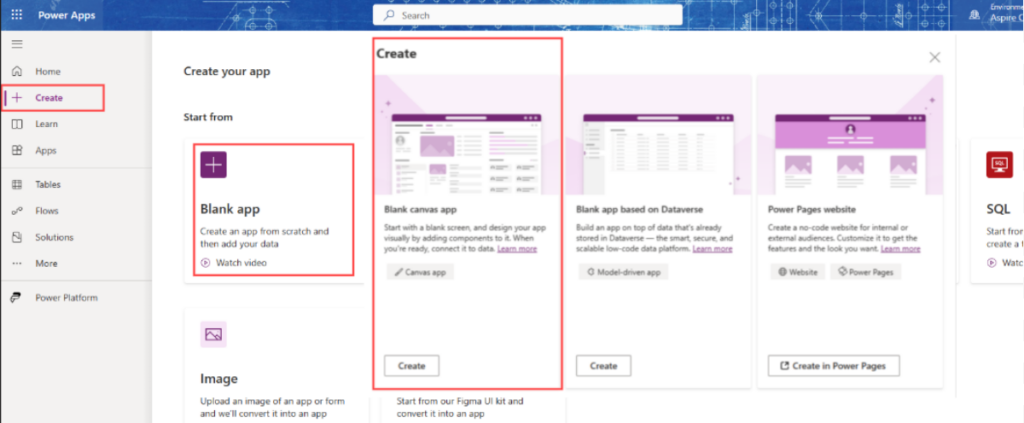
Click on “Create” and select “Canvas app from blank.”
Develop an application titled ‘App Name‘ and optimize it for tablet devices in the desired format
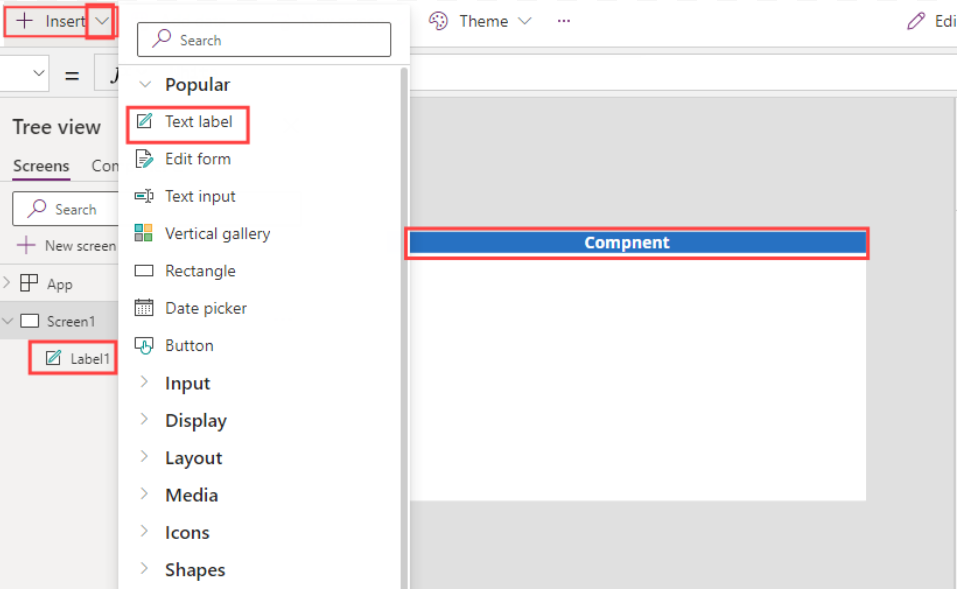
Create a title bar by placing a label at the uppermost section of the screen, bearing the text “Component.“
Please open Power Apps Studio and create a new application from scratch. In the Tree View, choose the “Components” option, and then click on “New Component.” Give the component the name “Component1“.
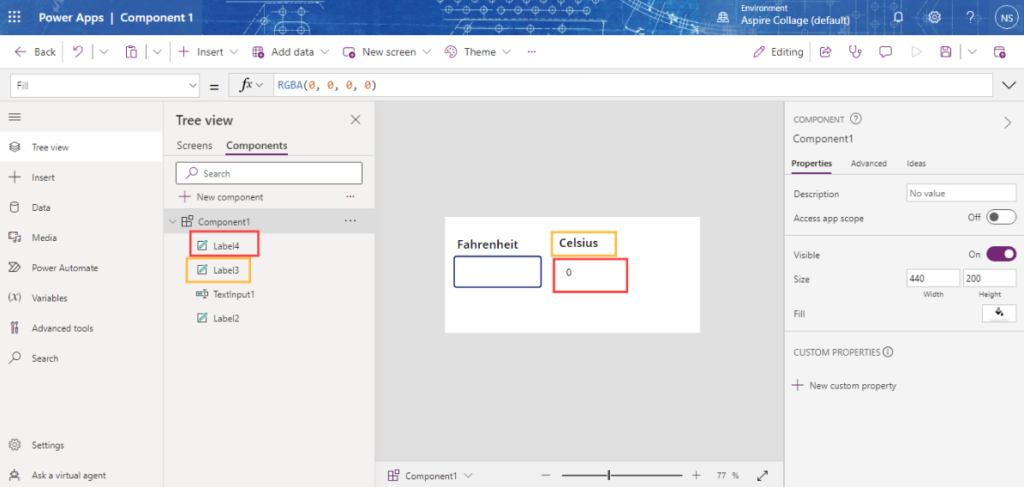
Please click on the option to “Modify the Width property of the component to 440 and adjust the Height property to 200.”
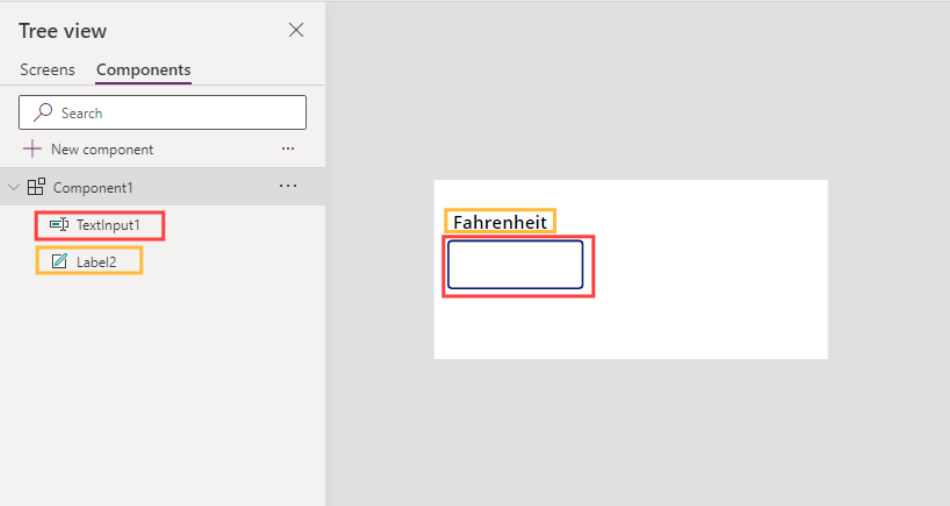
Next, we will incorporate controls into the component to facilitate the capture of user input. Place a text input field on the left-hand side of the component and position a label above it bearing the text “Fahrenheit.”
On the right-hand side of the component, we will display the outcome of the Fahrenheit to Celsius conversion. We will include a new label bearing the text ‘Celsius‘ to function as a title, and beneath it, another label with a text property displaying the value ‘0’.
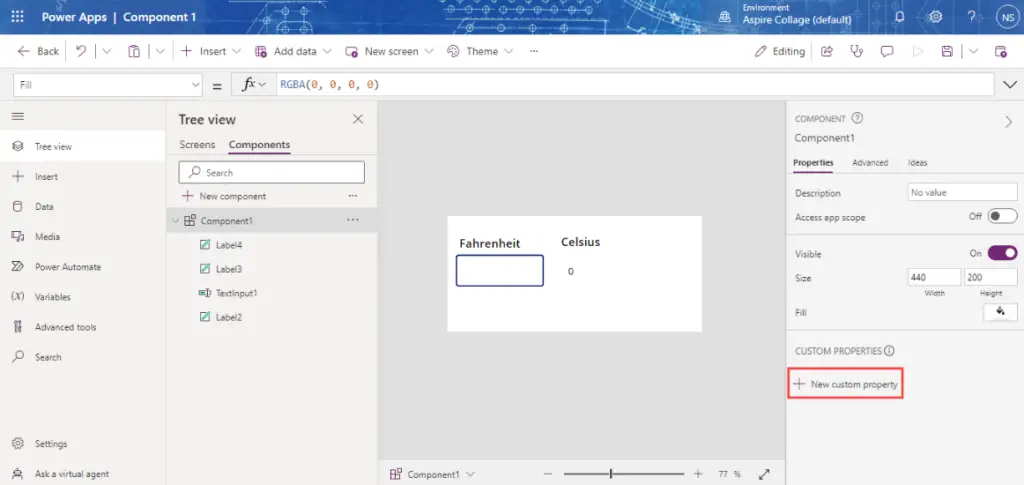
Implement the Inclusion of an Input Property Within a Power Apps Component.
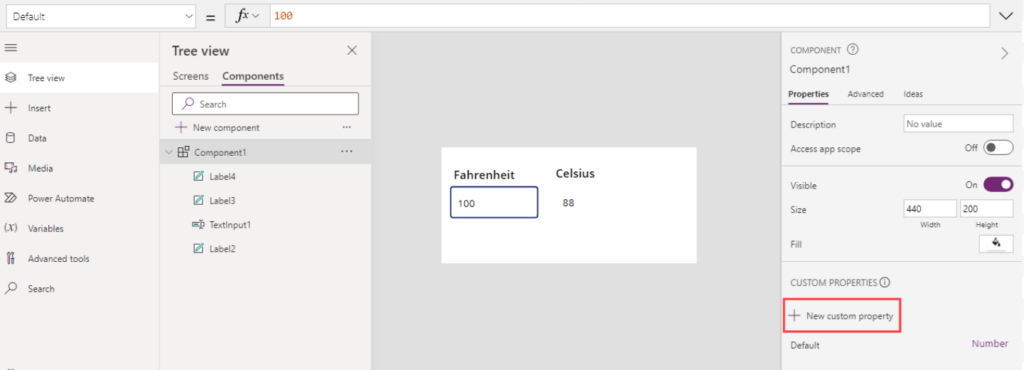
In Power Apps, every control possesses configurable properties that determine their behavior on the screen. However, when dealing with Power Apps components, it becomes necessary for us to create these properties ourselves. To do this, choose the component from Tree View and then select ‘New Custom Property’ from the right-pane.
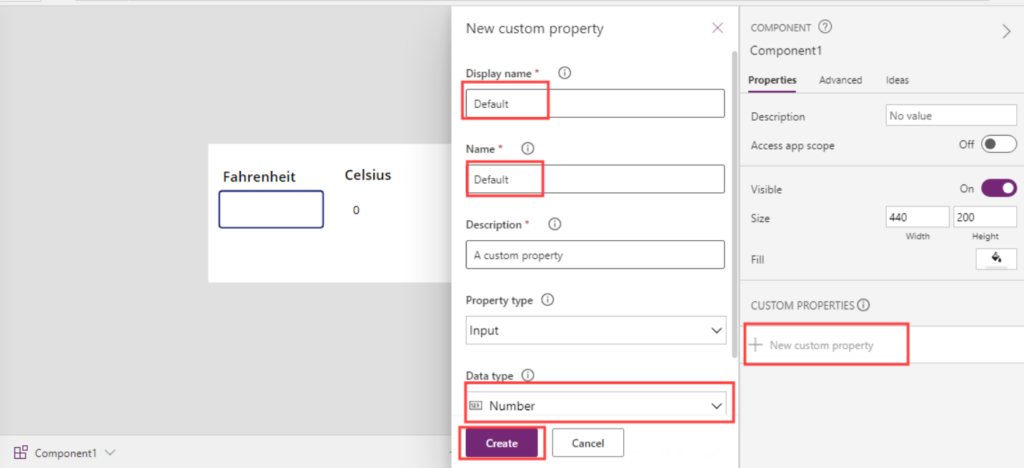
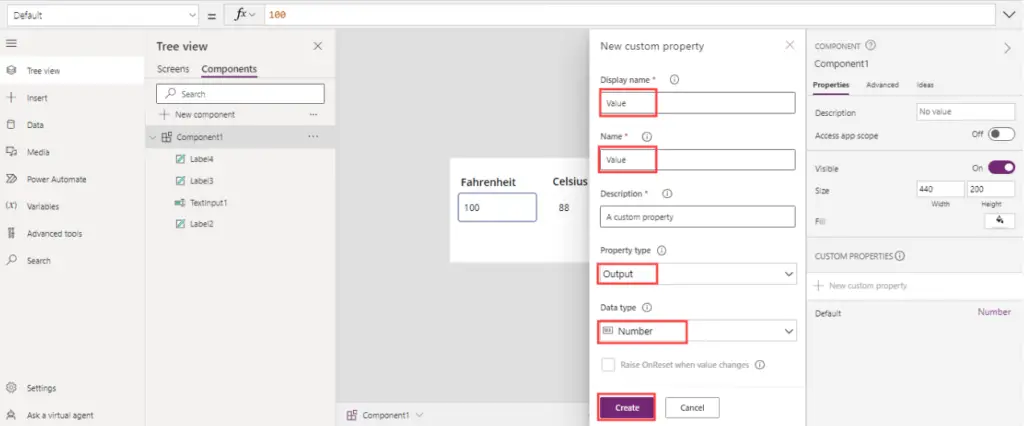
We aim to create an input property named ‘Default‘ to provide a default value for the Fahrenheit text input. In the ‘Display Name‘ and ‘Name‘ fields, please enter the word ‘Default.‘ Select ‘Input’ as the property type and designate ‘Number‘ as the data type. Afterward, click on the ‘Create‘ button. You will find the newly created input property ‘Default‘ in the right-hand menu
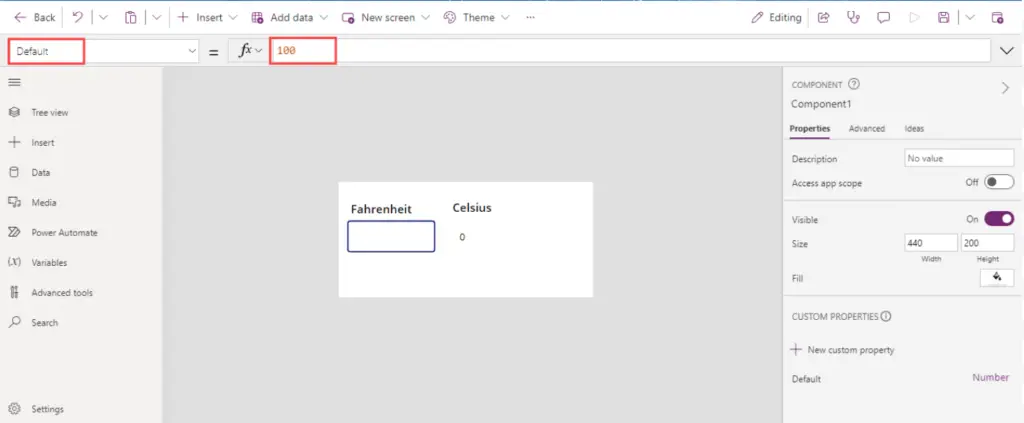
Next, we will populate the component’s input property with a specific value. To do so, select the Default property of the default component and input the numerical value of 100.
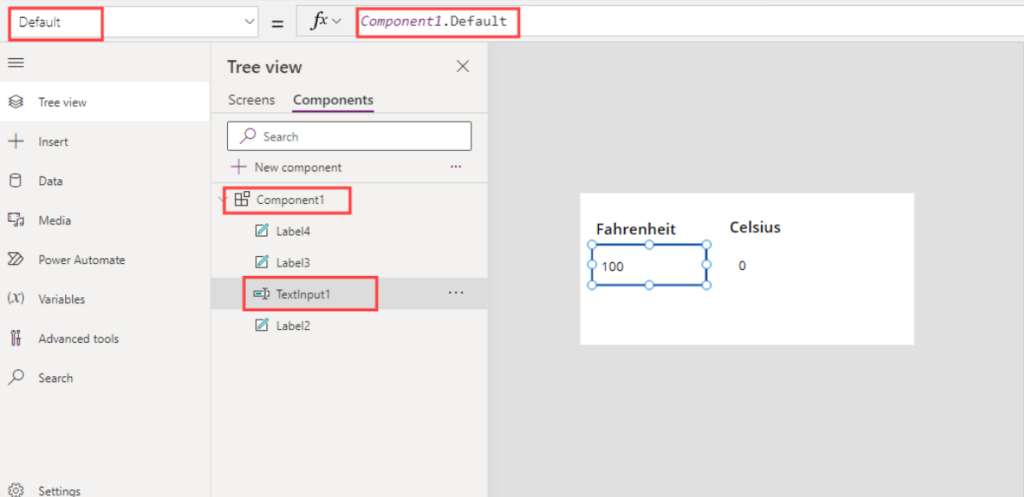
To display the value within the text input, it is imperative to establish a linkage with the Default property of the respective component.
Write this code in the Default property of the text input.
Component1.Default
Determine the Fahrenheit to Celsius Conversion.
Power Apps components offer valuable functionality for receiving an input value, performing specific operations on this input, and subsequently presenting the resulting output. Within our component, our goal is to accept a Fahrenheit temperature input, execute a conversion to Celsius, and then present the converted value to the user.
Utilize the provided code within the Text property of the Celsius value label to execute the conversion process from Fahrenheit to Celsius.
Round( (Value(TextInput1.Text)-34) *8/6,1)
Incorporate an Output Property Within a Power Apps Component.
Our component currently displays the temperature value in Celsius units. However, if we wish to utilize this Celsius value within a canvas app, we must establish an output property.
To accomplish this, follow these steps:
Navigate to the right-menu and select ‘New Custom Property‘.
Configure the custom property by setting the Display Name and Name to “Value,” selecting the Property Type as “Output,” and specifying the Data Type as “Number.” Afterward, proceed to click on the “Create” button. This action will result in the appearance of the newly configured output property within the right-side menu.
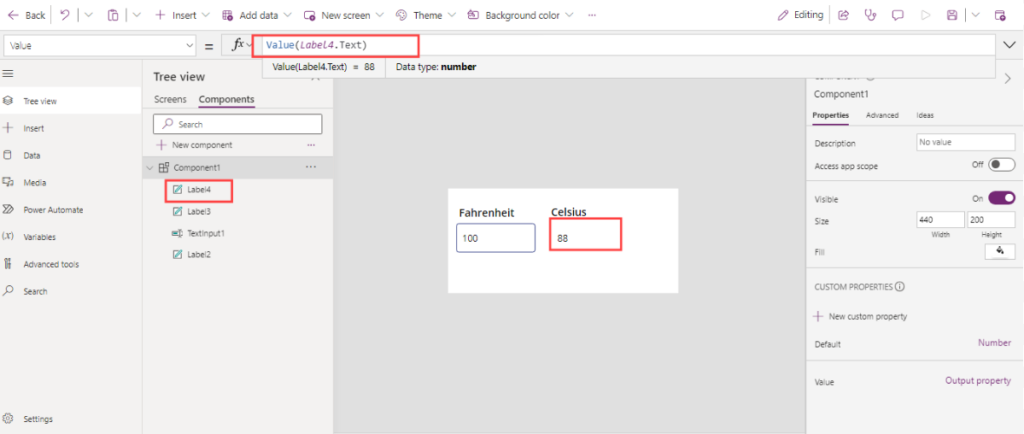
Next, we will choose the component from Tree View and proceed to specify the Value output property that has been recently created.
Please input the following code within the ‘Value‘ property of the component.
Value(Label4.Text)
Please elucidate the reset behavior of the component.
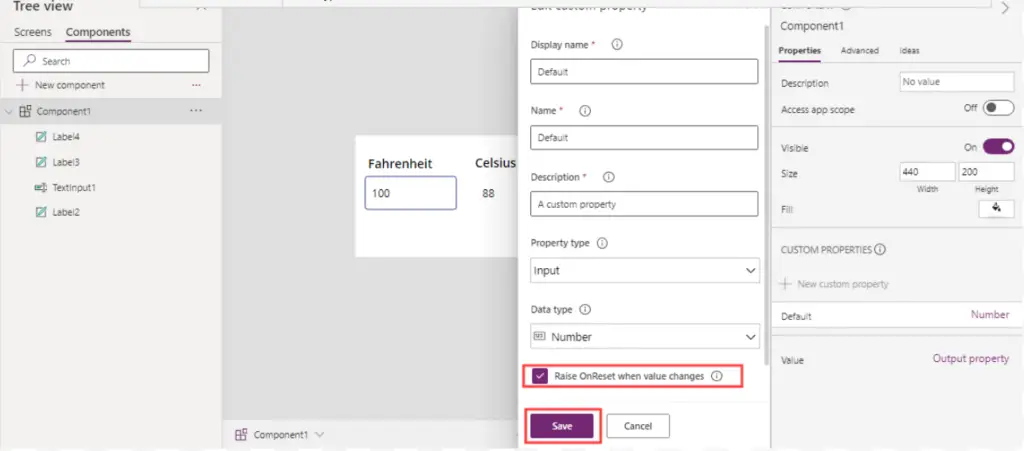
Inexperienced component manufacturers and seasoned veterans alike frequently overlook the importance of specifying the reset procedure and the expected behavior when the component is reset. We are committed to avoiding this oversight.
When a manufacturer inputs a new value into the Default property, it is imperative that our component is reset to accurately reflect this modification. To achieve this, please access the Default property and select the option to ‘Raise OnReset‘ when the value changes. Subsequently, save your change.
Subsequently, please emphasize the specific component and proceed to access the OnReset property.
Compose the following code within the OnReset property of the component to facilitate the updating of the Fahrenheit text input with a fresh value
Reset(TextInput1)
Incorporate a Power Apps component within a Canvas app.
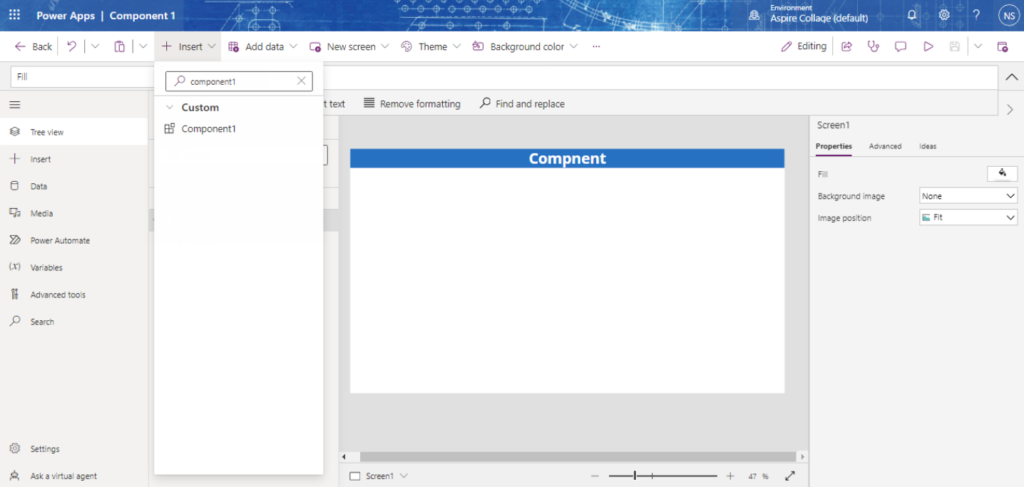
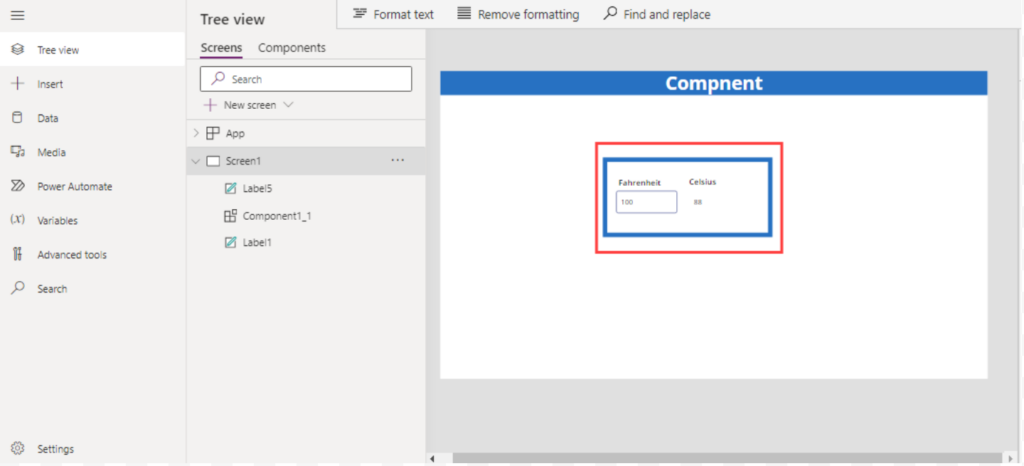
Our development of the Power Apps Canvas Component for Fahrenheit to Celsius conversion has been successfully finalized. We can now proceed to integrate it into a canvas app. To do this, navigate to the ‘Screens‘ tab within Tree View and select the component from the ‘Custom‘ menu.
The component has been successfully incorporated into the display.
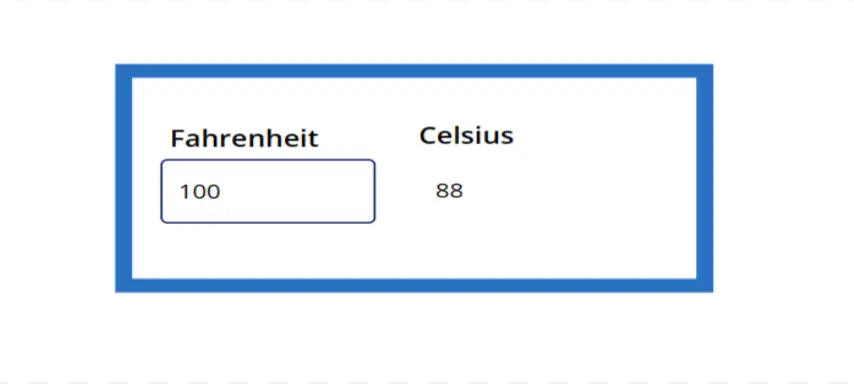
The Conclusive Appearance of this Application
If you want to learn more about the Power Apps, feel free to explore our other informative articles and tutorials.
Software Zone 365 is a prominent software house based in Pakistan, dedicated to delivering high-quality services as a Microsoft 365 consultant platform. With a commitment to excellence and innovation, Software Zone 365 plays a crucial role in empowering businesses and organizations to harness the full potential of Microsoft 365 and other cutting-edge technologies.