Power Apps People Picker Delegation Workaround
Introduction: The I/T Hardware Request App
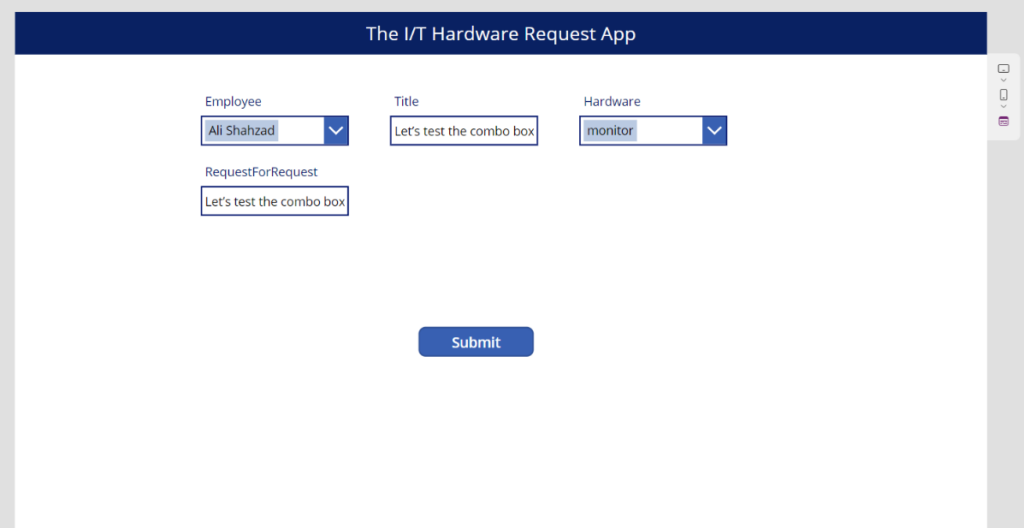
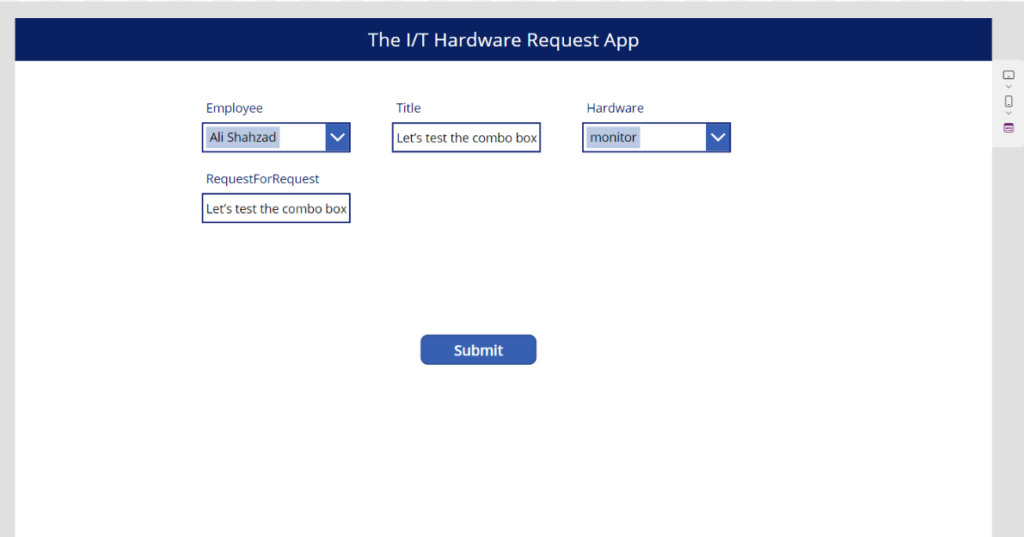
The I/T Hardware Order Tool allows managers to acquire new computer devices for their team members. The manager chooses an employee from the dropdown menu, picks the desired hardware, and forwards the request to the I/T department.
Setup The SharePoint List
Set up a new SharePoint list titled ‘IT Hardware Requests’ with these columns:
Employee – of type ‘person’ Hardware – of type ‘choices’ (options: desktop computer, laptop, monitor, phone) RequestDetails – of type ‘multiple lines of text’
Initially, the SharePoint list won’t have any data. However, as we begin utilizing our app for hardware requests, it will appear as follows:

Create A Form With A People Picker
Launch Power Apps and initiate a new blank app. At the top, insert a label reading “I/T Hardware Request Form.” Subsequently, establish a data link to the SharePoint list titled “IT Hardware Requests.

Insert an Edit Form onto the screen and connect it to the IT Hardware Requests SharePoint list.
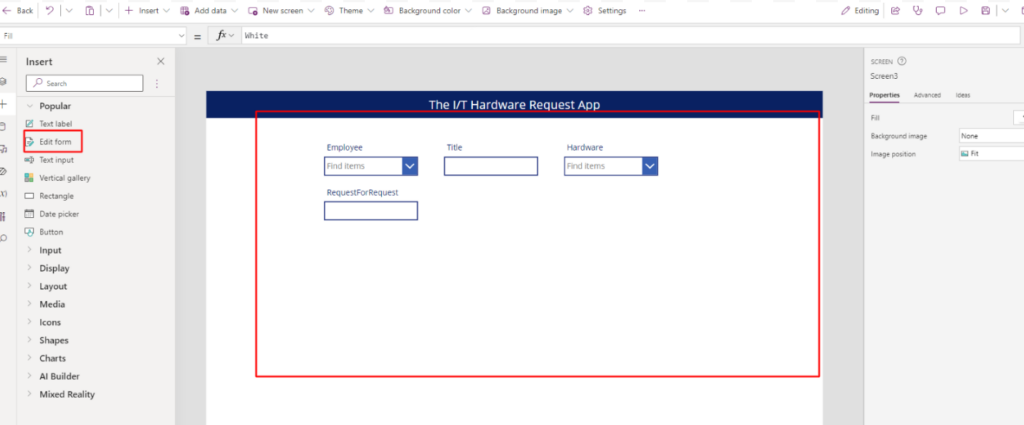
Set the form’s DefaultMode to ‘New’. This ensures a new record is generated upon form submission.
FormMode.New
The combo box’s placeholder text should read “Find people” rather than “Find items.”

Write this code in the ‘DataCardValue2’ property of the combo box to display the words “find people” when no selection has been made.
"Find people"
Delegation Problems With Using The Choices Function
Managers identify employees requiring new hardware through a dropdown menu. Initially, the Edit Form utilizes the Choices function for the dropdown’s Items property. However, this function has delegation constraints, displaying only the initial 500 members of an organization, though this limit can be extended to 2,000.
For organizations exceeding 2,000 members, the dropdown will only show a subset of employees. I’ll guide you through a solution to make every organization member selectable by leveraging the Office 365 Users connector.

Populate The People Picker With Office 365 User Search Results
Add the Office 365 Users data connector to the app.

We will use the search for users (V2) feature of the Office 365 Users connector to populate the combo box with employee names.
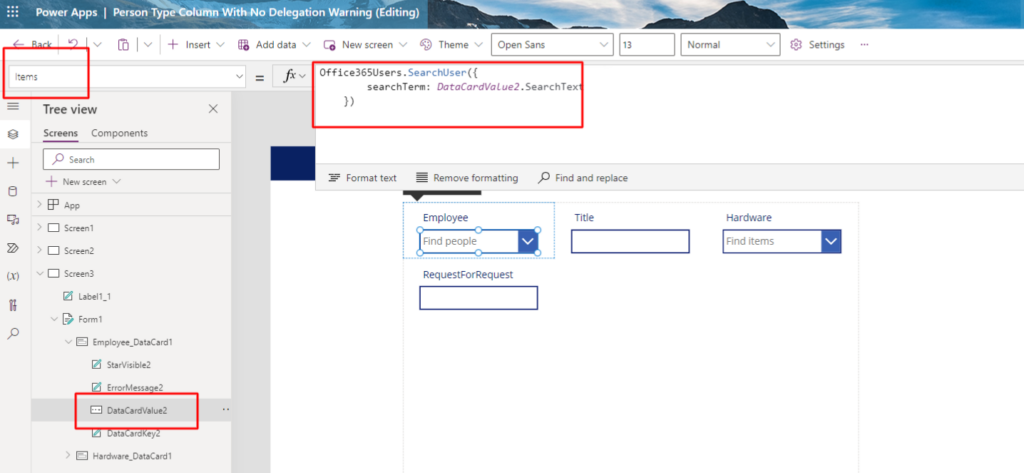
Enter this code into the ‘Items’ property of the combo box. The ‘searchTerm‘ parameter examines the text input by the user to refine the results. Even though the ‘top’ parameter is set to 50, it scans all employees within the organization and fetches the top 50 matches. There’s no need to set it to the maximum of 999 results for the intended result in this scenario.
					Office365Users.SearchUser({
        searchTerm: DataCardValue7.SearchText
    })
We want to display the user’s full name and email in the combo search results.

Modify the ‘DisplayFields’ property of the combo box using the following code.
["DisplayName","Mail"]
Likewise, we aim to search using the user’s complete name or email address.
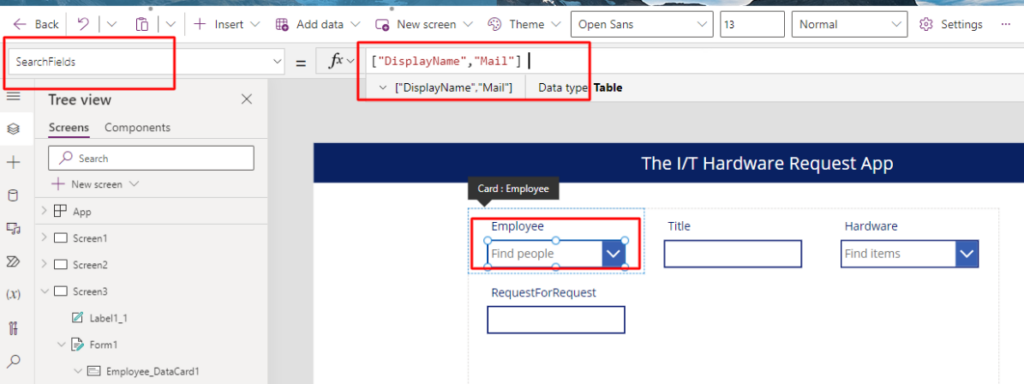
Apply the identical code to the combo box’s SearchFields property.
["DisplayName","Mail"]
Test The People Picker Combo Box
Let’s test the combo box to make sure it properly displays user names and emails from our organization. Select the dropdown button on the combo box . A list of employees will appear. If the desired employee does not appear in the list the user will have to use search to find them.

Modify The People Picker Card’s Update Property
When we changed the Items property of the form, the schema of the employee records we are working with also changed. We must modify the Update property of the employee card control to match this new schema. Otherwise, the employee record will not be written to the new SharePoint list item.
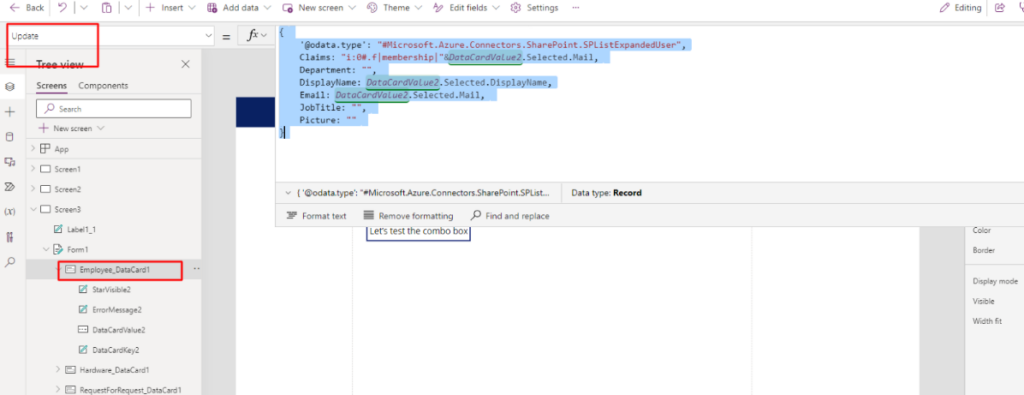
Implement this code in the ‘Update’ property of the employee card control. It’s identical to the code you’d apply when patching a person field.
					{
    '@odata.type': "#Microsoft.Azure.Connectors.SharePoint.SPListExpandedUser",
    Claims: "i:0#.f|membership|"&DataCardValue2.Selected.Mail,
    Department: "",
    DisplayName: DataCardValue2.Selected.DisplayName,
    Email: DataCardValue2.Selected.Mail,
    JobTitle: "",
    Picture: ""
}
Submit The Hardware Request Form
The setup for the people selection dropdown is complete. Now, we’ll create a method for the manager to submit the form. Please add a new button at the form’s end.
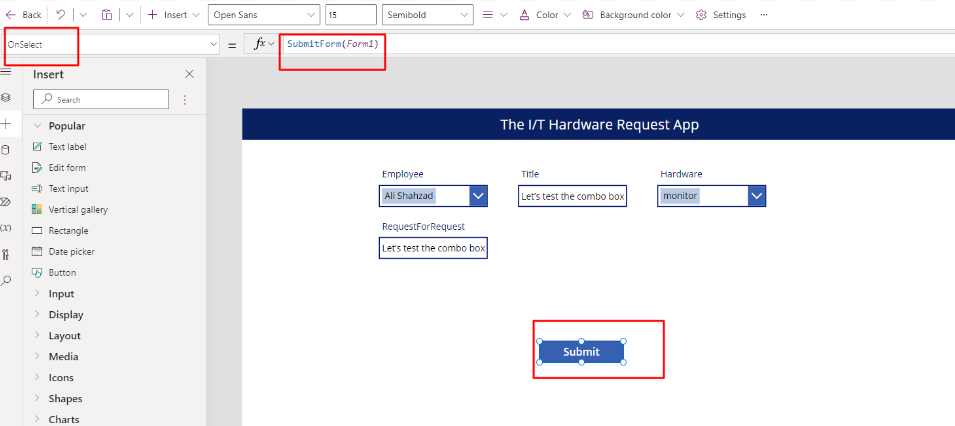
When the form is successfully submitted, we aim to show a success alert and switch the form to display mode.
SubmitForm(Form1)
When the form is successfully submitted, we aim to show a success alert and switch the form to display mode.
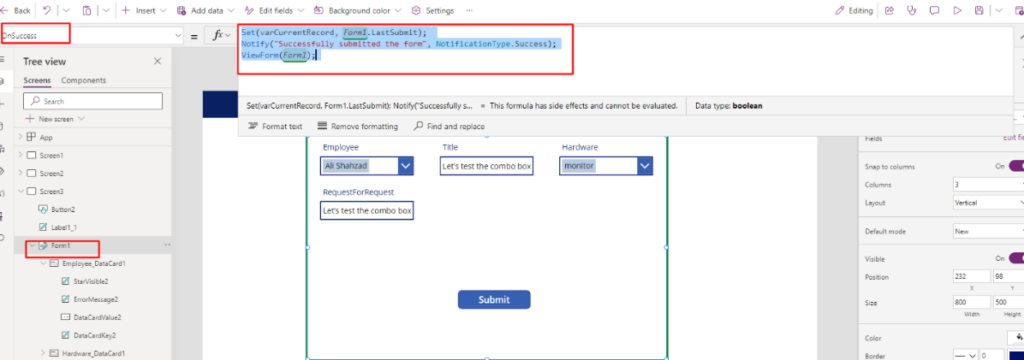
Input this code into the ‘OnSuccess’ attribute of the form.
					Set(varCurrentRecord, Form1.LastSubmit);
Notify("Successfully submitted the form", NotificationType.Success);
ViewForm(Form1);
We desire the form to show the latest entered record when in viewing mode.
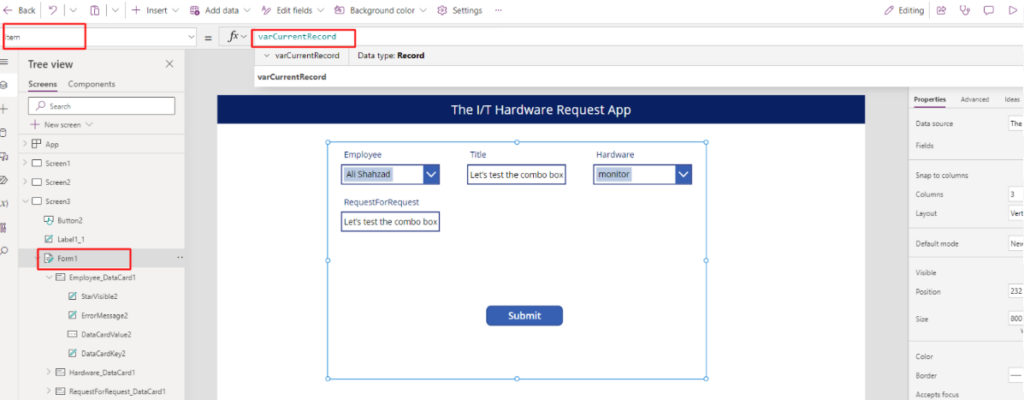
Update the form’s Item property with the following code.
varCurrentRecord
If the form doesn’t submit successfully, we need to show an error message.

Enter this code into the ‘OnFailure’ attribute of the form.
Notify("Error: form was not submitted", NotificationType.Error)
Test The People Picker And Form Submission
Alright everyone, feel free to try out the form. Once submitted, it should add a new entry to the SharePoint list.
